Client Module
The Client module is used by clinicians to view and manage personal caseloads, alerts, and groups. The Client module also allows clinicians to view the caseloads and alerts of other clinicians.
This section includes the following topics:
• Alerts
• Accessing Alternate Caseloads
• Using the Patient Assistance Whiteboard
• Using the ID Number Entry Module for Multiple Clients
• Using the Treatment Diagnosis Module
• Using the Treatment Plan Module
• Signing Treatment Plan Batches
• Using the Memo to Chart Module
The Client Search module is used to access clinical records. Client searches allow access to the clinical records that are in the current organizational branch alone. (An organizational branch includes all organizations above and below the current organization.) If the client episode was created in a different organizational branch, it cannot be accessed through client search.
Using the Client Search Module to Search for Clients
1. Navigate to Client > Show Menu > Client Search. The Client Search Form appears.
The more criteria entered, the more narrow the search results will be. |
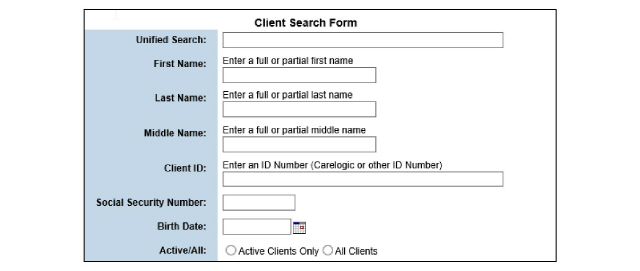
2. Fill out the necessary information and click Submit in the status bar. The Client Search Results page appears.

Using the Status Bar Search to Search for Clients
The Search feature located in the Status Bar can also be used to search for clients.

1. Type all or part of the name into the Client Search field in the Status Bar and press Enter. The Client Search Results page appears. Client ID and birth date are also able to be searched, if known.

CareLogic Alerts indicate that a user action is needed.
1. Click the My Alerts (flag) button in the Navigation Bar. The My Alerts wizard will be displayed. The wizard (side menu) will identify whose alerts are displayed and display alerts by categories.
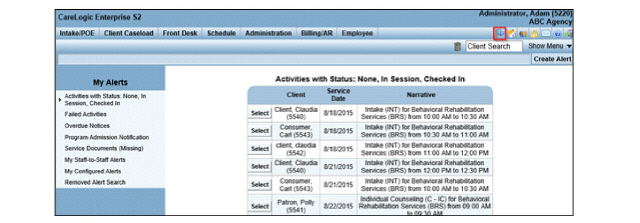
2. Select the alert type from the side menu to see alerts of that type.
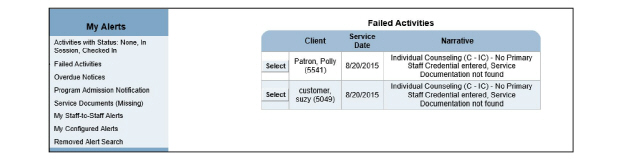
3. Click the Select button that corresponds with the alert needing resolution. After resolving the condition causing the alert, click Submit in the status bar. Once the alert is resolved, it is removed from the Alerts page.
The Alternate Alerts module allows users to look at other user’s alerts.
1. Navigate to Client > Show Menu > Alternate Alerts. The Alternate Staff Alerts page appears.

2. Choose the staff member from the drop down and click Submit. The staff member’s alerts are displayed.

Staff-to-staff Alerts provide a secure method of sending a message between staff members.
1. Access Alerts by clicking the flag in the status bar. Click Create Alert. The Create Alert page appears.
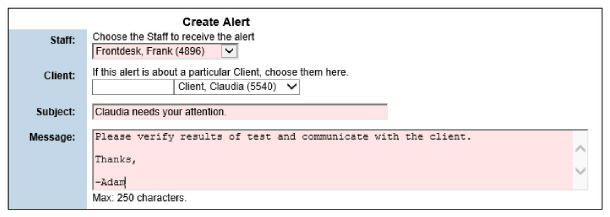
2. Fill out the needed information and click Submit.
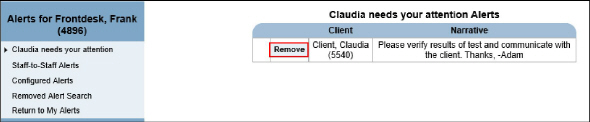
Resolving Informational Alerts
Informational Alerts are for communication between users.
1. Navigate to My Alerts by clicking the flag in the status bar. Click the desired alert in the side bar then click the Remove button.
Action Alerts notify users that action needs to be taken.
1. Access Alerts by clicking the flag in the status bar. Select the Action Alert category in the sidebar. Alerts in that category will be displayed.
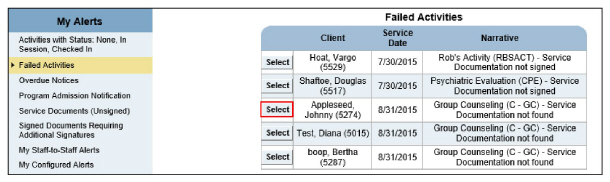
2. Click Select to view the issue and correct it as needed.
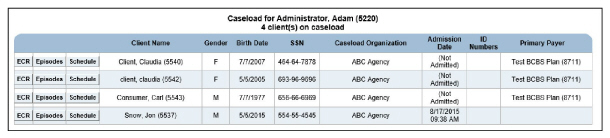
The Caseload is displayed by default when the Client tab is clicked. The Caseload page is used to view and manage clients.
1. Click the Client tab. The Caseload page appears.
This page is used to perform the following tasks:
• Accessing a Client’s Episode of Care List
• Accessing a Client’s Schedule
The Electronic Client Record (ECR) is a subset of the Client tab. The first step of many processes in CareLogic is to access the patient’s ECR. There are multiple ways of accessing the ECR. The basic process is to find the desired patient in the system, then click their ECR button.
Accessing the ECR for Clients on the User’s Caseload
1. Navigate to Client tab. The Client Caseload appears.
2. Click the ECR button that corresponds with the clinical record desired. The selected client’s ECR is opened.

Accessing the ECR for Clients Outside the User’s Caseload
1. Perform a client search in the Status Bar or by navigating to Client > Show Menu > Client Search. The Client Search Results page appears.

2. Click the ECR button that corresponds with the clinical record desired. The selected client’s ECR is opened.
Accessing the ECR from the Schedule
1. Click the Schedule button. The user’s Schedule page appears.
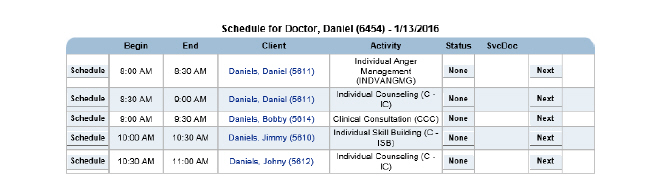
2. Click the client name desired and that client’s ECR appears.
Accessing the ECR from the Front Desk
1. Click the Front Desk button. The Front Desk Schedule page appears.

2. Click the client name desired and that client’s ECR appears.
Accessing a Client’s Episode of Care List
1. Find the desired client on the Caseload page or by search > Click the Episodes button that corresponds with the clinical record desired. The selected client’s episodes list is opened.

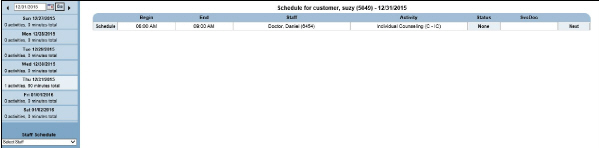
1. Find the desired client on the Caseload page or by search > Click the Schedule button that corresponds with the desired client. The Schedule page appears. (See the Schedule Guide.)
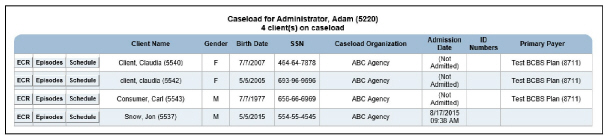
The Alternate Caseloads functionality allows any user to look at other user’s caseloads.
1. Navigate to Client > Show Menu > Alternate Caseload. The Alternate Caseload Selection page appears.

2. Use the drop-down list to select the staff member whose caseload is desired and click Submit. Their Caseload page appears.
To create a group, see the System Administrator Guide. |
1. Navigate to Client > Show Menu > My Groups. The Group List page appears.

This page is used to perform the following tasks:
• Updating Client Group Rosters
1. Navigate to Client > Show Menu > My Groups > Click the Select button that corresponds with the group desired. The Group Information page appears.
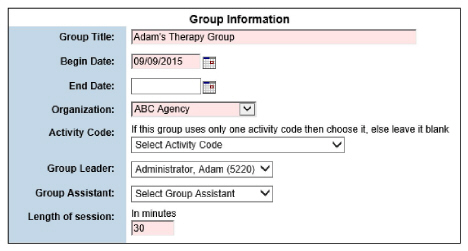
2. Change the information as needed and click Submit in the status bar. The group assignment is updated and listed on the Group List page.
1. Navigate to Client > Show Menu > My Groups > Click the Roster button for the group desired. The Roster page appears for the selected group.
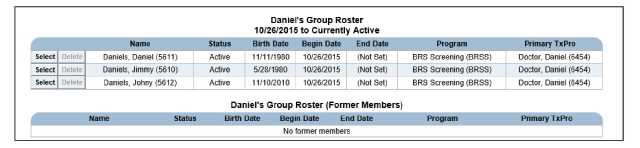
2. After making the desired edits, click Submit in the status bar. The updated roster is saved.
The Orders Whiteboard module provides a view of the active orders in the system.
1. Navigate to Client > Show Menu > Order Whiteboard. The In-Process Orders page appears.
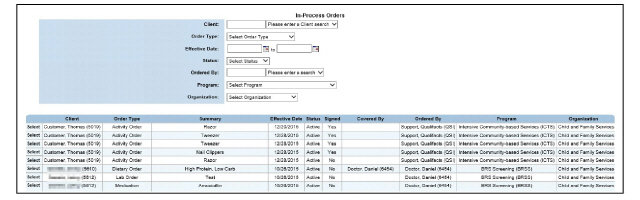
2. Use the filters, if needed, and click Submit in the status bar. In-Process Orders is refreshed to display the search criteria.
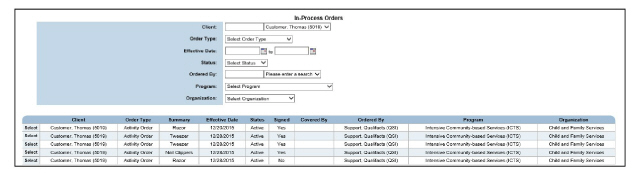
3. Click the Select button for the desired order. The Orders module appears.

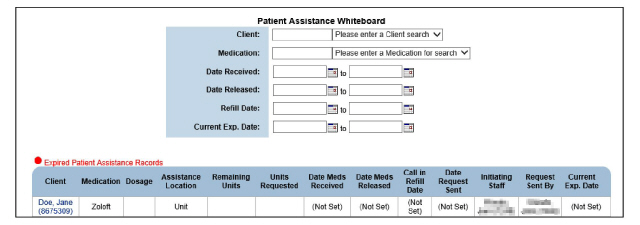
Using the Patient Assistance Whiteboard
Patient assistance programs provide low-income consumers with medications at no cost. The Patient Assistance Whiteboard provides a view of consumers receiving patient assistance. This component includes records entered through the Patient Assistance module. It also allows new patient assistance records to be entered in batch mode. (See Adding Patient Assistance Records in Batch Mode.)
1. Navigate to Client > Show Menu > Patient Assistance Whiteboard. The Patient Assistance Whiteboard page appears. By default, the search results section displays all active patient assistance records in the system.
This page is used to perform the following tasks:
• Searching for Specific Patient Assistance Records
• Adding Patient Assistance Records in Batch Mode
Searching for Specific Patient Assistance Records
1. Navigate to Client > Show Menu > Patient Assistance Whiteboard > Filter the information using the fields at the top of the page and click Submit in the status bar. The page is refreshed to display records that match the search criteria.

Adding Patient Assistance Records in Batch Mode
Patient assistance records can also be entered for individual clients through the Patient Assistance module.
1. Navigate to Client > Show Menu > Patient Assistance > Add Multiple Patient Assistance. The Add Multiple Patient Assistance Data page appears.

2. Fill out the information needed and click Submit in the status bar. The patient assistance records are saved and listed on the Patient Assistance Whiteboard.
Patient assistance records entered in batch mode automatically populate in the Patient Assistance module. |
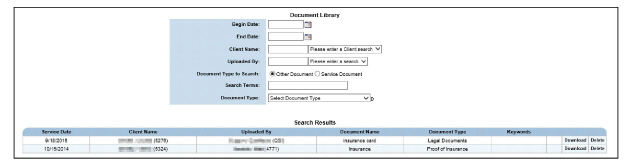
The client-scanned Document Library module allows the search and view of service documents that are attached to client ECRs. It allows the search of entire organizations or specific client ECRs.
Because this view of the Document Library searches across the entire organization, document records for clients may be displayed to which the user has no access. For those clients, the service date and client name will be displayed, but the Document Type column indicates the document has Restricted Access. In emergency situations, these documents are able to be viewed, but first an explanation for the access and the user’s electronic signature are required by the system. |
1. Navigate to Client > Show Menu > Document Library. The Document Library page appears.
2. Use the fields to filter information and click Submit in the status bar. The Document Library page refreshes, displaying updated search results.
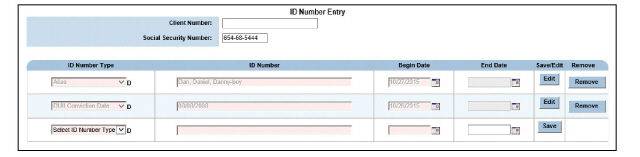
Using the ID Number Entry Module for Multiple Clients
The ID Number Entry module provides the ability to add and track identifiers for clients. These can be found using Client Search. It is not limited to tracking clients by numbers, it also supports text. Typical uses for this field include things like aliases and drivers license numbers.
1. Navigate to Client > Show Menu > ID Number Entry. The ID Number Entry - Multiple page appears.

2. Fill out the needed information. The ID Number field is where the additional ID can be entered. Click the Save button. A new row appears to record additional client IDs.

3. Repeat as needed, to record multiple client IDs.
Using the Treatment Diagnosis Module
The Treatment Diagnosis service document module is used to build and record the diagnoses of consumers.
Because the Treatment Diagnosis is a service document module, it can be configured in many different ways. The instructions below describe a general Treatment Diagnosis process and may vary from system to system. To configure the diagnoses available, see Diagnosis Categories in the System Administration Guide. To configure a service document instance including the Treatment Diagnosis module, see Service Documents in the System Administration Guide. |
1. Navigate to ECR > Show Menu >Treatment Diagnosis. The TXDIAG - Treatment Diagnosis page appears.

2. Click Add a Treatment Diagnosis. The Treatment Diagnosis wizard appears.
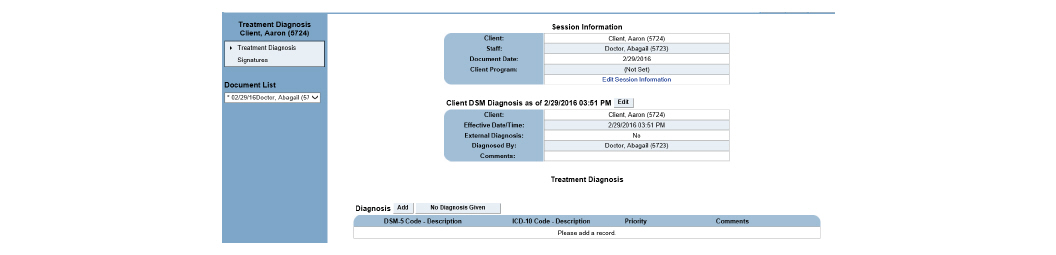
3. Click the Add button in the Treatment Diagnosis area. The Diagnosis Entry page appears.
The No Diagnosis Given button can add an applicable DSM-5 code to this area if needed. |

4. Fill out the needed information and click Submit. The Diagnosis information is added to the Treatment Diagnosis page.

5. Click the Add button in the Psychosocial and Contextual Factors section. The Psychosocial and Contextual Factor Entry page appears.

6. Fill out the needed information and click Submit. The psychosocial and contextual factor information is added to the Treatment Diagnosis page.

7. Click the Add button in the Diagnostic Formulation section. The Diagnostic Formulation Entry page appears.

8. Fill out the needed information and click Submit. The diagnostic formulation information is added to the Treatment Diagnosis page.

9. Once all sections are filled to the clinicians liking, click Submit. The Electronic Signatures page appears.

10. Sign the document and click Submit. The Treatment Diagnosis is saved and listed on the TXDIAG - Treatment Diagnosis page.
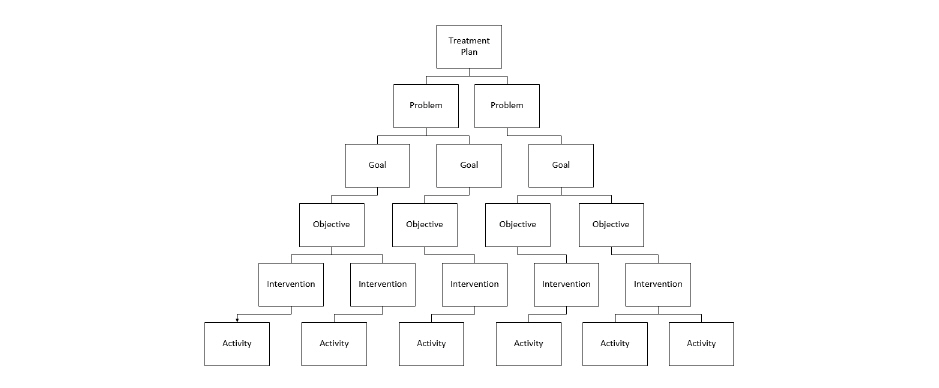
Using the Treatment Plan Module
The Treatment Plan is used to record the problems, goals, objectives, interventions, and activities that the clinician prepares and intends to use over the course of a consumer’s treatment. It is a hierarchy that can be built as robustly as needed. There can be only one active Treatment Plan at a time. However, multiple problems can be addressed under one plan, each with multiple goals, objectives, interventions, and activities.
Because the Treatment Plan is a service document module, it can be configured in many different ways. The instructions below describe a general process for filling out a Treatment Plan and methods may vary from system to system. To configure the Treatment Plan module, see Treatment Plan Grids in the System Administration Guide. To configure a service document instance including the Treatment Plan module, see Service Documents in the System Administration Guide. |
1. Navigate to ECR > Show Menu > Treatment Plan. The TXPLAN - Treatment Plan page appears.

2. Click Add a Treatment Plan. The Treatment Plan Entry appears.

3. Fill out the needed information and click Submit. The Problem page appears.
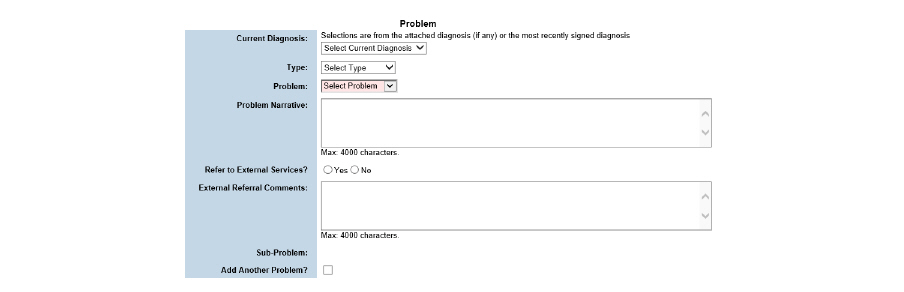
4. Enter the needed information about the problem and click Submit. The problem is listed on the Problem(s) page.

5. Click the Goal(s) button to add goals to the problem.

6. Click Add Goal.

7. Fill out the needed information and click Submit. The goal appears on the Goal(s) page.

8. Click the Objective(s) button to add objectives to the goal.

9. Click Add Objective.
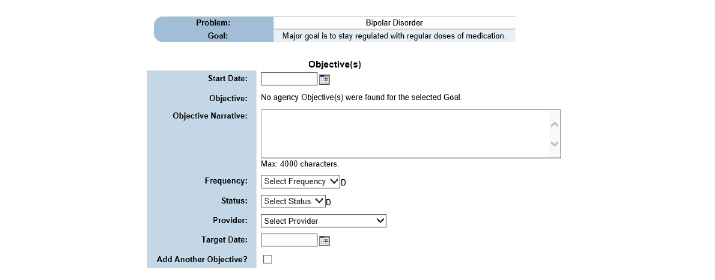
10. Fill out the needed information and click Submit. The objective is saved on the Objective(s) page.

11. Click the Intervention(s) button to add interventions to the objective.

12. Click Add Intervention.
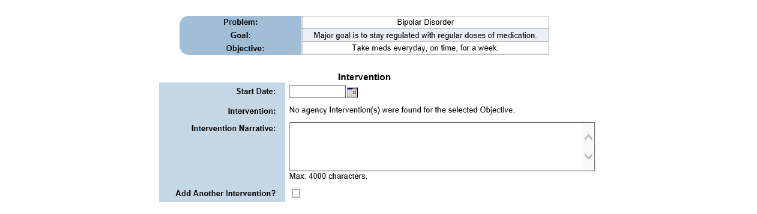
13. Fill out the needed information and click Submit. The intervention is saved on the Intervention(s) page.

14. Click the Activities button to add activities to the intervention.

15. Click Add Activities. The Activities page appears.
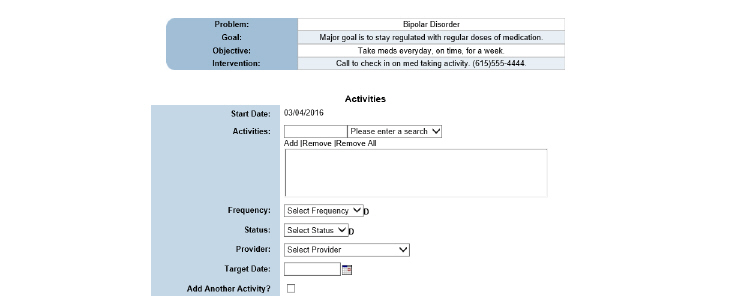
16. Fill out the needed information and click Submit. The activity is saved on the Activities page.

1. Navigate to the ECR > Show Menu > Treatment Plan. The Treatment Plan page appears.

2. Click the Review button for the treatment plan needing review. The Treatment Plan Review page appears.

3. Fill out the needed information and click Submit. The TXPLAN - Treatment Plan page reappears with an unsigned copy of the treatment plan available. This copy can be reviewed, changed, and submitted as needed.

Signing Treatment Plan Batches
The Batch Treatment Plan Signature module allows the user to sign multiple treatment plans requiring a signature at once rather than doing so individually.
1. Navigate to Client > Show Menu > Batch Treatment Plan Signature. The Batch Treatment Plan Signature page appears.

2. In the Staff Required to Sign field, search for the staff member whose treatment plans need a signature and click Submit. The Batch Treatment Plan Signature is refreshed with the staff member’s treatment plans needing a signature.

3. Click the Report button to review treatment plans individually before signing off on them.
4. Check the boxes of treatment plans needing a signature, enter the electronic signature, and click Submit in the status bar. All selected treatment plans become signed.
Using the Memo to Chart Module
The Memo to Chart module is used like a sticky note would be used on a paper chart. It can be used for a variety of purposes to record information in a client’s medical record.
1. Navigate to ECR > Show Menu > Memo to Chart.

2. Click Add a Memo to Chart. The Memo to Chart Entry page appears.
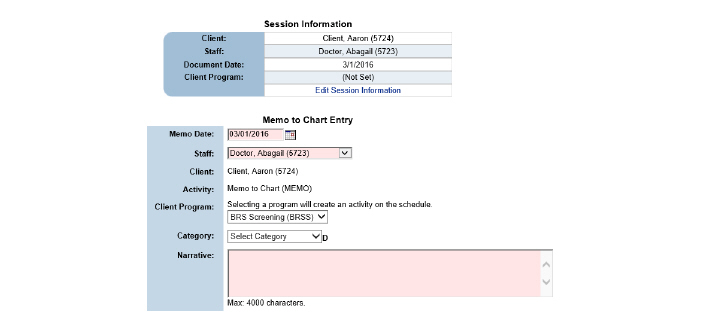
3. Fill out the needed information and click Submit. The Electronic Signatures page appears.
When a memo is associated with a treatment program, a one-minute activity is created based on the note added. If no treatment program is selected in this field, it will not create the one minute activity. |
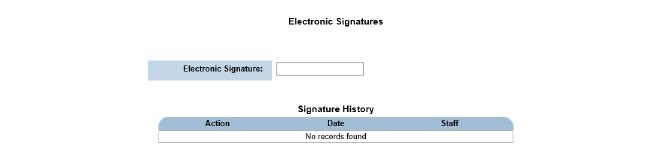
4. Electronically sign the document and click Submit. The memo is saved on the MEMO - Memo to Chart page.
Detach Memo to Chart from an Activity
1. Navigate to ECR > Show Menu > Memo to Chart.

2. Click the Detach button for the desired Memo to Chart record. A confirmation page appears.

3. Click the Yes radio button and click Submit. The activity and program are detached from the record.

Add an Addendum to a Memo to Chart
1. Navigate to ECR > Show Menu > Memo to Chart.

2. Click the Addenda button for the desired Memo to Chart record.

3. Click Add Addendum.
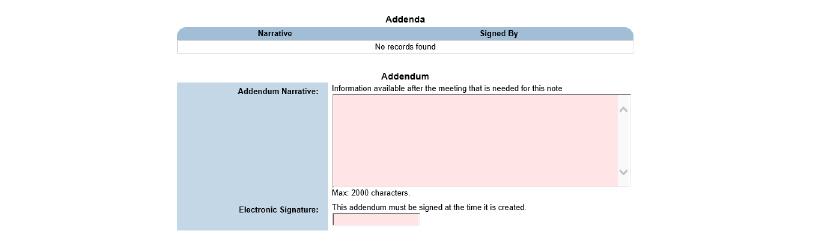
4. Fill out the needed information and click Submit. The addendum appears on the Addenda page.
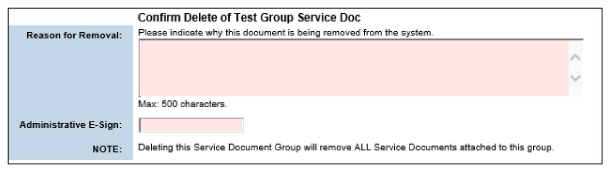
1. Navigate to ECR > Show Menu > Memo to Chart. Click the Delete button for the desired Memo to Chart record.
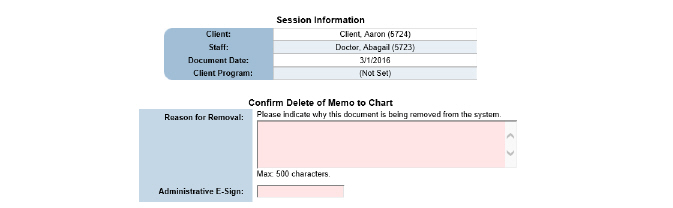
2. Fill out the needed information and click Submit. The document is removed from the MEMO - Memo to Chart page.
1. Navigate to ECR > Show Menu > Memo to Chart.
2. Click the Audit button for the desired Memo to Chart record. The Audit Log page appears.

This chapter contains the following topics:
• Update Demographic Information
• Updating Client Name History
• Maintaining Contact Information
• Maintaining Client Relationships
• Maintaining Staff Relationships
• Maintaining a Client’s Bed History
• Maintaining PCP/Pharmacy Information
• Uploading a Client’s Picture
• Record a Client ID Number Entry
Update Demographic Information
Normally, a client’s demographic information is entered through the Point of Entry module. (See the Point of Entry Guide). After POE, demographics can be updated through the ECR or the Front Desk, depending on workflow. |
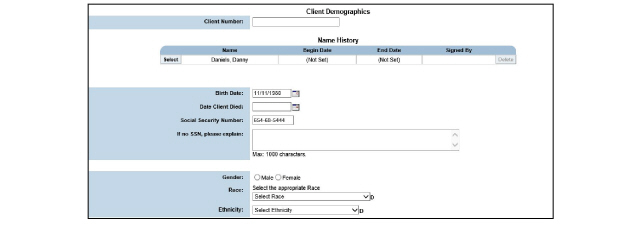
1. Navigate to the ECR > Show Menu > Basic Information/Demographics. The Client Demographics page appears.
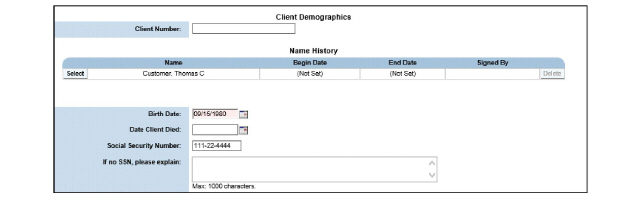
2. Fill out demographics needing an update and click Submit in the status bar. The demographic information is saved.
When a client’s name changes it can be updated. CareLogic provides the ability to track any name changes for that client.
Name changes cannot be dated in the future. |
1. Navigate to the ECR > Show Menu > Basic Information/Demographics. The Client Demographics page appears.
2. To update the client’s name history, click the Select button that corresponds with the most recent client name. The Name History page appears, displaying the current client name information as read-only text and a New Name section that allows updates.
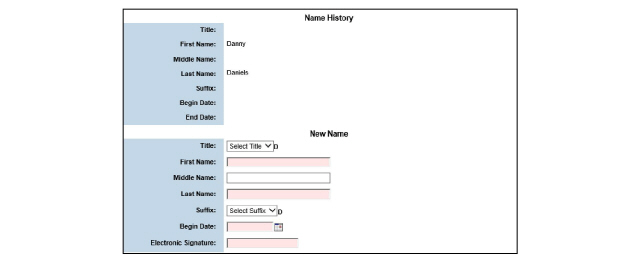
Inactive client names will show in read-only text. |
3. Fill out the information and click Submit in the status bar. The client name change is saved to the system and displayed on the Client Demographic page under Name History.
Name changes cannot be dated in the future. Only names active at or prior to the current day will be accepted. |
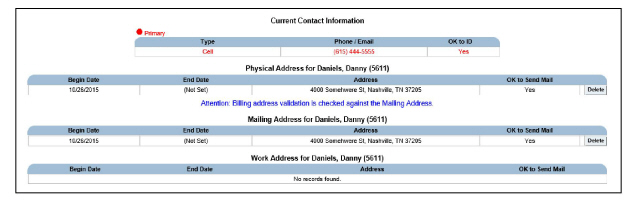
Maintaining Contact Information
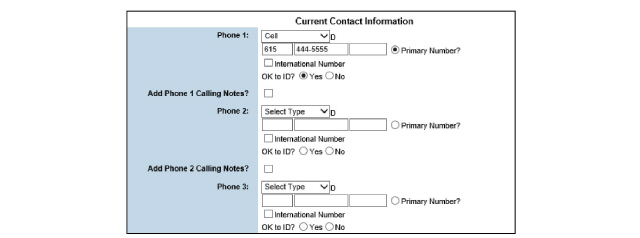
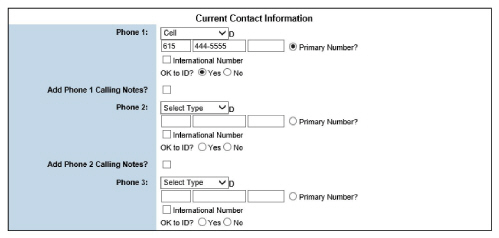
The Contact Information module is used to maintain the client’s physical address, mailing address, work address, telephone numbers, and e-mail address. Contact information records are normally created through the Point of Entry module. (See the Point of Entry Guide.) A client can have only one active physical, mailing, and work address at a time.
1. Navigate to ECR > Show Menu > Contact Information. The Current Contact Information page appears for the selected client. This page is used to track the client’s physical, mailing, and work address.
This page is used to perform the following tasks:
• Adding Client Address Information
• Updating a Client’s Contact Information
Adding Client Address Information
1. Navigate to ECR > Show Menu > Contact Information > Add Address. The Add Address Type page appears.

2. Select the Address Type from the drop down and the (Type) Address Form appears.
Only Address Types that have not already been completed will be available in the drop down. |
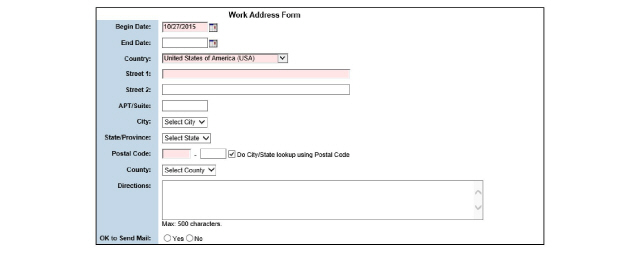
3. Fill out the needed information and click Submit in the status bar. The address record is saved and listed on the Address page.
Updating a Client’s Contact Information
1. Navigate to ECR > Show Menu > Contact Information > Update Contact. The Current Contact Information page appears.
2. Fill out the needed information and click Submit in the status bar. The address record is saved and listed on the Address page.
Maintaining Client Relationships
The Client Relationships module is used to create a record of client relationships to individuals outside of the organization. These relationships can include probation officers, social workers, therapists at other organizations, and family members in the same living environment. Unlike staff relationships (see Maintaining Staff Relationships), client relationships have no effect on other areas of the system. They are set up for informational purposes only.
1. Navigate to ECR > Show Menu > Client Relationships. The Client Relationships page appears.

This page is used to perform the following tasks:
• Editing Client Relationships
• Setting Up the Head of Household
1. Navigate to ECR > Show Menu > Client Relationships > Add Relationship. The Client Relationship Entry page appears.
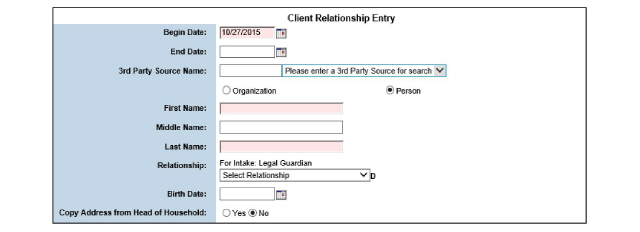
2. Fill out the needed information and click Submit in the status bar. The client relationship is saved and listed on the Client Relationships page.
1. Navigate to ECR > Show Menu > Client Relationships > Click the Select button that corresponds with the client relationship needing edits. The Client Relationship Entry page appears.
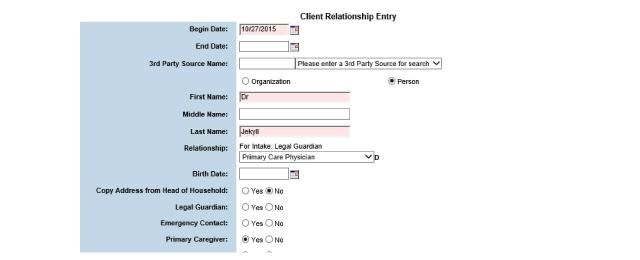
2. After making the desired edits, click Submit in the status bar. The updated client relationship is saved and listed on the Client Relationships page.
Setting Up the Head of Household
By default, the client is listed as the head of household. Head of Household can also be changed through the Client Relationships module directly.
1. Navigate to ECR > Show Menu > Head of Household. The Family List page appears.

2. Click the Search Family Members button. The Family Members Search Form appears.
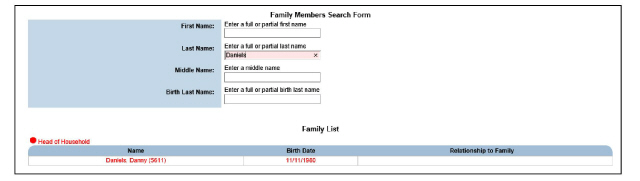
3. Use the search fields to look for the person who will be assigned head of household. Click Submit in the status bar. The Client Search Results page appears.

4. Click the Add Member button to add the record to the Family List.

5. In the Head of Household column, click the radio button desired to change the head of household.
Maintaining Staff Relationships
When a staff relationship is created, the client is added to the staff member’s caseload. Although a client can have unlimited staff relationships, they can have only one primary staff relationship during a date range.
1. Navigate to ECR > Show Menu > Staff Relationships. The Client Staff Relationships page appears.

This page is used to perform the following tasks:
• Deleting Staff Relationships
Once a staff relationship is added to the system, it can be edited using the Select button on the Client Staff Relationships page. |
1. Navigate to ECR > Show Menu > Staff Relationships > Add New Relationship. The Client Staff Relationship Form page appears.
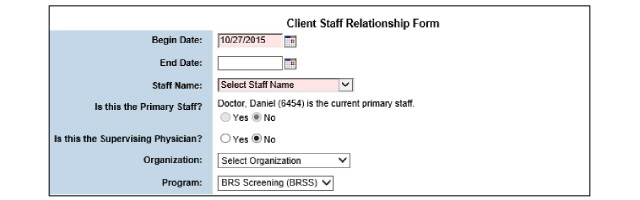
2. Enter the information needed and click Submit in the status bar. The staff relationship record is saved and listed on the Client Staff Relationships page.
1. Navigate to ECR > Show Menu > Staff Relationships > Click the staff name needing edits. The Client Staff Relationship Form appears.
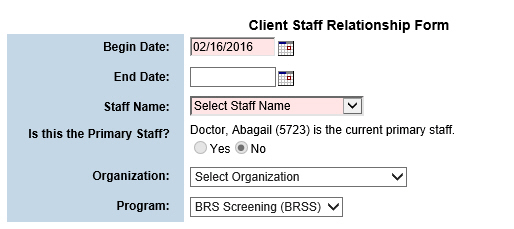
2. After making the desired edits, click Submit in the status bar. The staff relationship is updated and listed on the Client Staff Relationships page.
1. Navigate to ECR > Show Menu > Staff Relationships. Click the Delete button of the staff relationship needing deletion. A confirmation message appears.
2. Select OK to confirm deletion. The client relationship is deleted and the client is removed from the staff member’s caseload.
The Program History module is used to track treatment programs in which clients have been enrolled.
In order to assign a client to a treatment program, the client must have a status of either Active or Referral. If the client has a status of either TSO (Telephone Service Only) or Discharged, a new episode of care or referral must be opened for the client through the POE tab. (See the Point of Entry Guide.) If an expired program record is listed on the Inactive Client Program list, the Reactivate button can be used to open a new episode of care. |
1. Navigate to the ECR > Show Menu > Program History. The Client Programs page appears.

This page is used to perform the following tasks:
• Assigning a Client to a Program
• Referring/Discharging Clients from Program History
• Assigning Absentee Dates for a Program
• Changing the Dates Associated with Program History
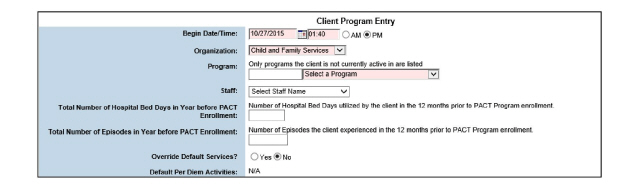
Assigning a Client to a Program
While the following will enroll a client into a program, it is recommended to use the Program Management functionality for standard assigning consumers to programs. (See Transfer and Discharge.) |
1. Navigate to the ECR > Show Menu > Program History > Add Program. The Client Program Entry page appears.
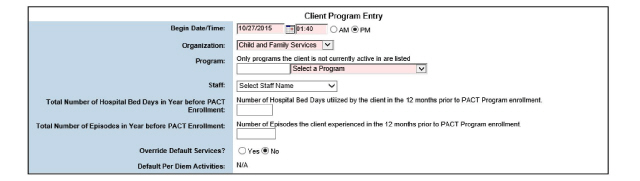
2. Fill out needed information and click Submit in the status bar. The program is saved and listed on the Client Programs page.
If a client has been scheduled for an appointment in a program, it cannot be edited. |
While the following will edit client programs, it is recommended to use the Program Management functionality for standard changes to programs. (See Transfer and Discharge.) |
1. Navigate to the ECR > Show Menu > Program History > Click the client program needing edits. The Client Program Entry page appears.
2. Make desired edits and click Submit in the status bar. The client program is updated and listed on the Client Programs page.
Referring/Discharging Clients from Program History
When discharging clients from inpatient services, it is recommended to use the discharge order functionality. This is done to capture the necessary information for the UB-04 or 837I forms. (See Creating Discharge Orders.) |
While the following will discharge clients from programs, it is recommended to use the Program Management functionality for standard discharges from programs. (See Transfer and Discharge.) |
1. Navigate to the ECR > Show Menu > Program History > Discharge. The Referral/Discharge page appears for the selected program.
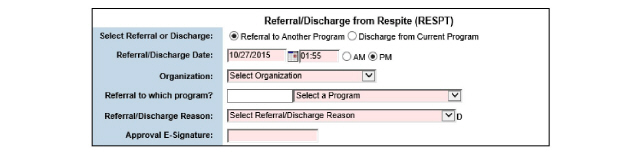
2. Fill out the needed information and click Submit in the status bar. The referral or discharge record is saved.
Assigning Absentee Dates for a Program
If the system is configured to use Bed Status, entering absentee dates for a client in the residential program will mark the status of the client’s bed as Absent. |
1. Navigate to the ECR > Show Menu > Program History > Click the Absentee Dates button that corresponds with the client program desired. The Absentee Date(s) page appears.

2. Click Add New Reason in the status bar. The Absentee Date Entry page appears.
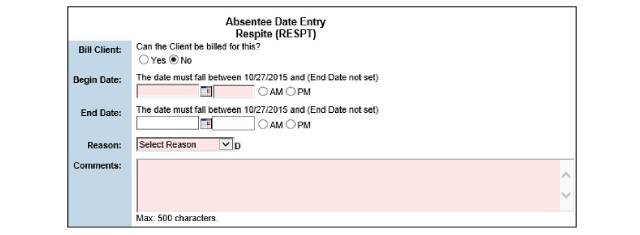
3. Fill out the needed information and click Submit in the status bar. The absentee dates are saved and listed on the Absentee Date(s) page.
Changing the Dates Associated with Program History
1. Navigate to the ECR > Show Menu > Program History > Click the Date Change button that corresponds with the client program desired. The Change Client Program Dates page appears.
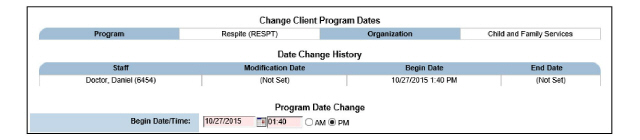
2. After making the desired edits, click Submit in the status bar. The client program is updated and listed on the Client Programs page
A client program cannot be deleted if it is attached to a client staff relationship, client group, claim records, or activity records. |
1. Navigate to the ECR > Show Menu > Program History > Click the Delete button that corresponds with the client program desired. The Delete Client Program Entry page appears.
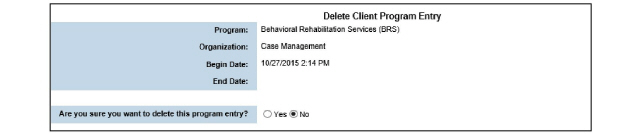
2. Select Yes then click Submit in the status bar. The selected program is removed from the system.
Maintaining a Client’s Bed History
In order to use the Bed History module, clients must be enrolled in per diem treatment programs. This module is used to perform the following tasks:
• Viewing a Client’s Bed History
• Changing an Occupant’s Length of Stay in a Bed
• Admitting a Client to a New Bed
• Removing a Client from a Bed
Per Diem is charged according to the program the consumer is enrolled in, not by the bed itself. (See Setting Up Programs for Beds in the System Administration Guide.) |
Viewing a Client’s Bed History
1. Navigate to the ECR > Show Menu > Bed History. The Client Bed History page appears.

Changing an Occupant’s Length of Stay in a Bed
1. Navigate to the ECR > Show Menu > Bed History > Click the Change button for the desired bed. The Bed Status Change Form page appears.
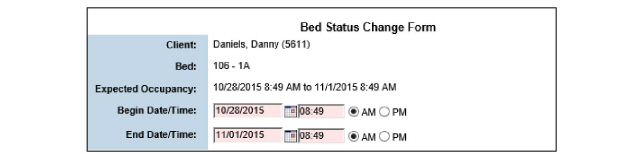
2. Change the needed information and click Submit in the status bar. The bed status is updated and listed on the Client Bed History page.
1. Navigate to the ECR > Show Menu > Bed History > Notes. The Notes History page appears for the selected client, displaying the notes added to the client’s bed stay history.

Notes are entered through the Bed Whiteboard. (See the The Bed Whiteboard.) |
1. Navigate to the ECR > Show Menu > Bed History > Status. The Bed Status page appears for the selected bed.

2. Assign the status and click Submit in the status bar. The status is saved and listed on the Client Bed History and Bed Whiteboard pages.
Admitting a Client to a New Bed
1. Navigate to the ECR > Show Menu > Bed History > Admit to a Bed. The Open Bed Search page appears.
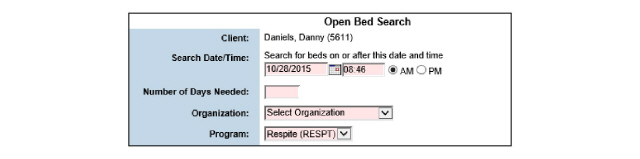
2. Fill out needed information and click Submit in the status bar. The system searches for all open beds that match the search criteria and displays the results on the Bed Search Results page.

3. Click the Select button that corresponds with the bed being assigned to the client. The Residential Admission page appears.
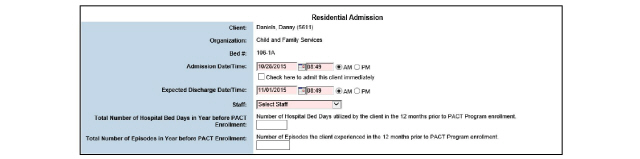
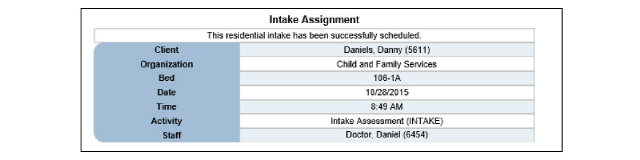
4. Fill out the information and click Submit in the status bar. The client is admitted to the bed and the admission details are listed on the Intake Assignment page.
1. Navigate to the ECR > Show Menu > Bed History > Remove from Bed. A confirmation page appears.

2. Select Yes to confirm removal and click Submit in the status bar. The client is removed from the bed and discharged from the program.
The Bed Whiteboard module is used to view and change the status of beds, to view the history of a bed, and to swap patients in beds.
1. Navigate to Client > Show Menu > Bed Whiteboard. The Whiteboard page appears.

Changing the Bed Status
1. Navigate to Client > Show Menu > Bed Whiteboard. The Whiteboard page appears.
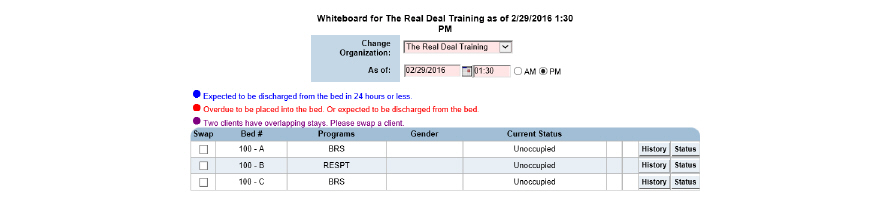
2. Click the Status button for the desired bed. The Bed Status page appears.
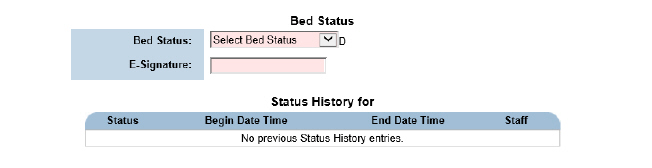
3. Fill out the needed information and click Submit. The Status is saved and displayed under the Current Status column on the Bed Whiteboard.
Viewing Bed History with the Bed Whiteboard
This is a history of the bed and its occupants. If a client’s bed history is needed see Viewing a Client’s Bed History. |
1. Navigate to Client > Show Menu > Bed Whiteboard. The Whiteboard page appears.
2. Click the History button for the desired bed. The Occupancy History for the bed appears.

Swapping Beds
1. Navigate to Client > Show Menu > Bed Whiteboard. The Whiteboard page appears.
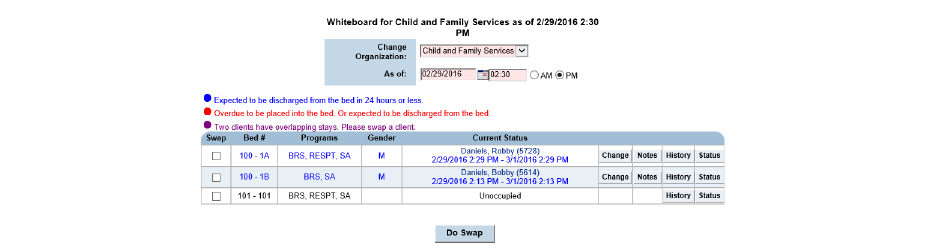
2. Click the boxes under the swap column for the desired beds, then click Do Swap at the bottom of the page. The patients’ beds are traded systematically.
Program Management, called Transfer/Discharge in some systems, is the preferred method of adding, removing, and/or transferring consumer’s enrollment in programs within the system. It is a Service Document instance that is included in baseline CareLogic. It is used as the preferred method because it end dates programs and assignments and cleans up future appointments on the schedule automatically. Correcting these can be time consuming, if done manually, and mistakes could cause errors in the system.
1. Navigate to ECR > Program Management. The TRSFR - CFS Transfer/Discharge page appears.

2. Click Add a CFS Transfer/Discharge. The CFS Transfer/Discharge wizard appears with the Program Management page selected.
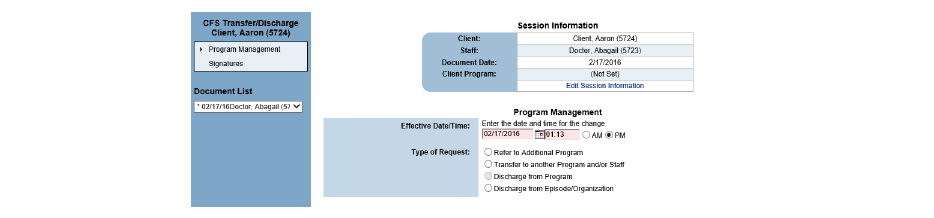
3. Fill out the information needed and click Submit. The Electronic Signatures page appears.
Selecting Change Programs under Transfer to another Program and/or Staff will: - End date the current program. - End date any client group assignments for that program. - Error all future activities scheduled for that program. - Create the new program. |
Selecting Discharge from Episode/Organization will: - End date all programs displayed. - End the selected episode of care. - End date client group assignments for the programs displayed. - End date client staff relationships for the programs displayed. - Error all future activities scheduled for the programs displayed. - Remove the client from their bed. (If applicable)
If it is the last open episode, it will also: - End date all payers. - End date all remaining client staff relationships. |

4. Sign the form electronically, if desired and click Submit. Any transfers or discharges are carried out.
The Client Groups module is used to assign clients to treatment groups.
1. Navigate to the ECR > Show Menu > Groups (Client Groups in some systems). The Group Assignments page appears.

This page is used to perform the following tasks:
1. Navigate to the ECR > Show Menu > Groups > Add Group Assignment. The Client Group Assignment page appears.
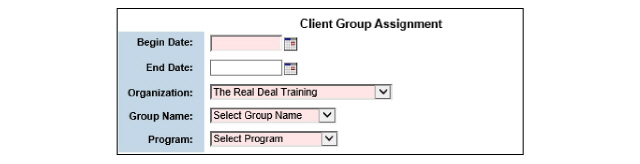
2. Enter the information and click Submit in the status bar. The group assignment is saved and listed on the Group Assignments page.
1. Navigate to the ECR > Show Menu > Groups > Click the group assignment desired. The Client Group Assignment page appears.
2. After making the desired edits, click Submit in the status bar. The group assignment is updated and listed on the Group Assignments page.
The Group Referrals module is used to refer clients to groups. Once the group referral record is complete, a system alert is sent to an approver. If the referral is approved, the client is added to the group’s roster.
The following link must be added to the ECR menu to use this module: client_group_referrals$.list?P_CLIENT_ID=::CLIENT_ID:: |
1. Navigate to the ECR > Show Menu > Group Referrals. The Group Referrals page appears.

2. Click Add Group Referral in the status bar. The Group Referral Form Entry appears.
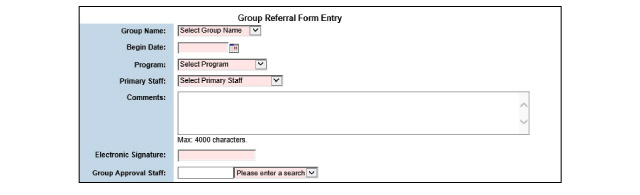
3. Fill out the needed information and click Submit in the status bar. The group referral record is saved and the group approval staff member receives an alert to approve.
Maintaining PCP/Pharmacy Information
The PCP/Pharmacy module allows the creation of a list of caregivers that the client visits outside of the organization.
The following link must be added to the ECR menu to use this module: client_pcp$.list?P_CLIENT_ID=::CLIENT_ID:: |
1. Navigate to the ECR > Show Menu > PCP/Pharmacy. The Primary Care Physicians/Other Providers page appears.

This page is used to perform the following tasks:
1. Navigate to the ECR > Show Menu > PCP/Pharmacy > Add a PCP. The Primary Care Physician/Other Provider page appears.
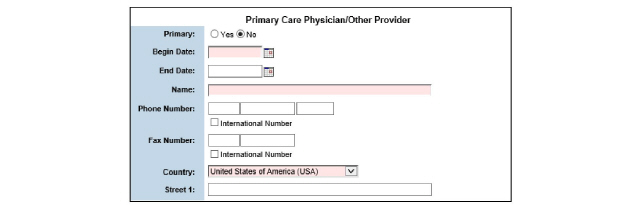
2. Fill out needed information and click Submit in the status bar. The physician record is saved and listed on the Primary Care Physician/Other Provider page.
1. Navigate to the ECR > Show Menu > PCP/Pharmacy > Add a Pharmacy. The Preferred Pharmacy Information page appears.
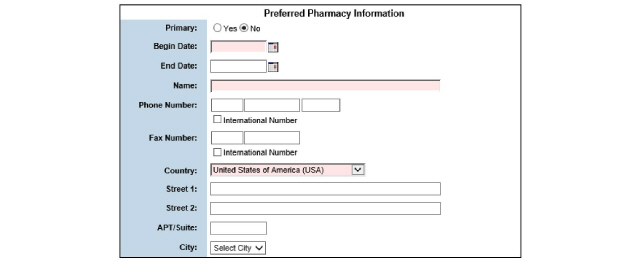
2. Fill out needed information and click Submit in the status bar. The pharmacy record is saved and listed on the Primary Care Physician/Other Provider page.
The Message Board module is used by staff to create messages about clients to share with other staff.
1. Navigate to the ECR > Show Menu > Message Board. The Client Messages page appears.

Client messages can be deleted. The ability to delete is a privilege that must be granted by a System Administrator. |
2. Click Add Message in the status bar. The Client Message Entry page appears.
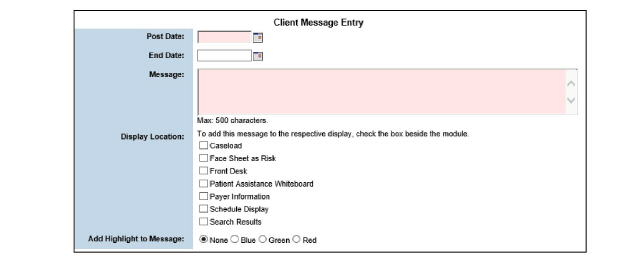
3. Fill out the needed information and click Submit in the status bar. The client message is saved and listed on the Client Messages page. The message will be displayed in the selected modules during the defined date range.

The Client Picture module is used to upload a digital picture of the client into the system. This feature helps staff members better identify the client. Once a client picture is uploaded, it appears on the Face Sheet page. (See Viewing a Client’s Face Sheet.)
The Client Picture module is limited to picture files with less than 30KB of data. |
1. Navigate to the ECR > Show Menu > Client Picture. The Client Pictures on Record page appears.

2. Click Upload in the status bar. The Client Picture Upload page appears.

3. Click the Browse button and locate the file to upload.
4. Click Submit in the status bar. The image is uploaded and displayed on the Client Picture Upload page.
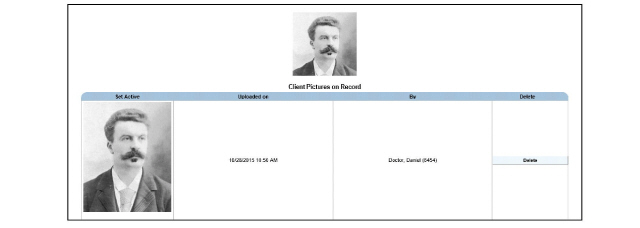
The Client Picture Upload page keeps a history of all the client pictures that have been uploaded into the system. The most recent picture is used by default. If there are multiple pictures for a client, click on the desired picture to change the one displayed on the Face Sheet page. |
1. Navigate to the ECR > Show Menu > Client Picture. The Client Pictures on Record page appears.
2. Locate the client picture needing deletion, and click the corresponding Delete button. A delete confirmation page appears.
3. Select OK to confirm deletion. The client picture is deleted from the system and removed from the Client Pictures on Record page.
Record a Client ID Number Entry
The ID Number Entry module provides the ability to add and track identifiers for clients. These can be found using Client Search. It is not limited to tracking clients by numbers. The module supports tracking by any text, so it can be used to track client aliases.
1. Navigate to the ECR > Show Menu > ID Number Entry. The ID Number Entry page appears.
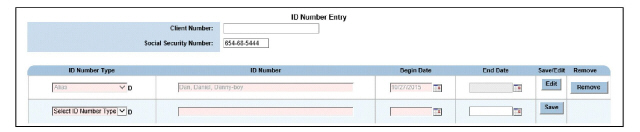
2. Fill out the needed information. The ID Number field is where the additional ID can be entered. Click the Save button. A new row appears to record additional client IDs.
3. Repeat, as needed, to record multiple client IDs at once. Click Submit in the status bar. The recorded ID numbers are saved in the client records and are now searchable in the Client Search box.
The following topics are included in this section:
• Maintaining Client Guarantors
• Maintaining Payer Authorizations
• Maintaining Client Responsibility
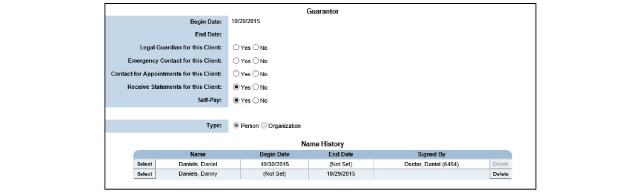
A guarantor is the policy subscriber of the client’s insurance plan. In most cases, the guarantor is the client, but can also be their parent, guardian, or spouse. The guarantor is responsible for paying the portion of the bill that is not covered by the payer (insurance). CareLogic allows the billing of payers and guarantors.
By default, clients are set up as their own guarantor. Additional guarantors can be set up for the client. If the client is covered by an insurance plan, the payer should also be set up. (See Maintaining Client Payers.)
Guarantor records are normally created through Point of Entry. (See the Point of Entry Guide.) |
To access the Guarantors page:
1. Navigate to the ECR > Show Menu > Guarantors. The Guarantors page appears.

This page is used to perform the following tasks:
• Updating Guarantor Name History
• Updating a Guarantor’s Address Information
• Updating a Guarantor’s Contact Information
• Tracking a Guarantor’s Date Range
By default, the client is listed as their own guarantor. It is recommended that clients be left as their own guarantor. |
Guarantor records are normally created through Point of Entry. (See the Point of Entry Guide.) |
When a guarantor record is added, the system performs a search on the guarantor’s name to verify that it does not already exist in the system. |
1. Navigate to the ECR > Show Menu > Guarantors > Add a Guarantor. The Guarantor page appears.
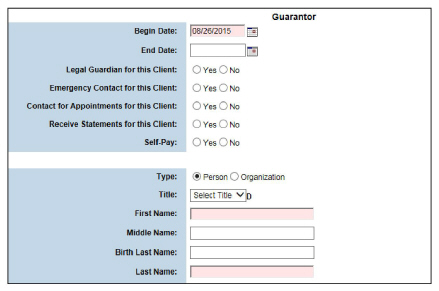
2. Fill out all needed information and click Submit in the status bar. The guarantor record is saved and listed on the Guarantors page.
Updating Guarantor Name History
When a guarantor’s name changes (marriage, divorce, adoption, etc.), their name can be updated in the system and the name change can be tracked.
When a guarantor’s name is changed on the Guarantor screen, the name will also change in the rest of the system. |
1. Navigate to the ECR > Show Menu > Guarantors > Click the Select button that corresponds with the guarantor record needing an update. The Guarantor page appears.
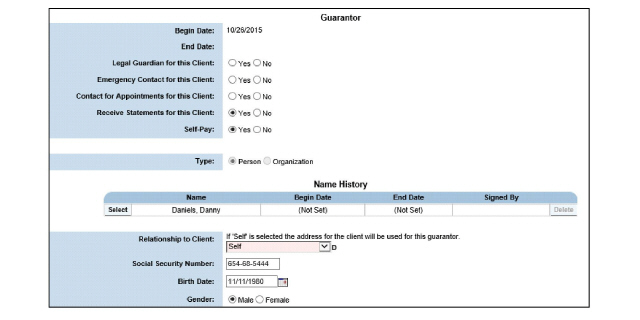
2. To update the guarantor’s name history, click the Select button in the Name History section that corresponds with the most recent guarantor name. The Name History page appears.
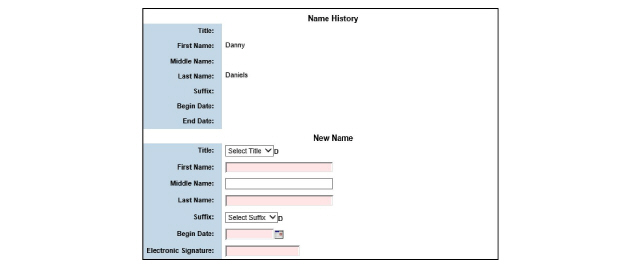
3. Fill out the information and click Submit in the status bar. The client name change is saved to the system and displayed on the Guarantors page under Name History.
Updating a Guarantor’s Address Information
In order to bill a guarantor for services, a mailing address needs to be in the system. When the Claim Engine runs, it will generate an error if a self-pay guarantor’s mailing address is missing or incomplete.
1. Navigate to the ECR > Show Menu > Guarantors > Click the Address button of the guarantor whose address needs an update. The Current Contact Information page appears.
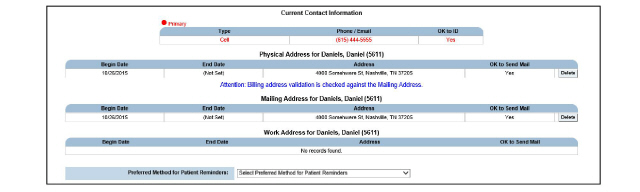
2. Click Add Address in the status bar. The Add Address Type page appears.

3. Use the drop-down list to select the type of address. The Address Form for the type is displayed.
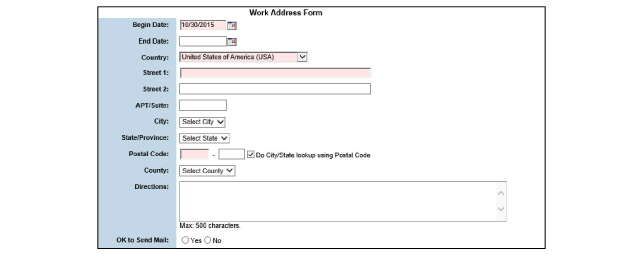
4. Fill out the form and click Submit in the status bar. The address record is saved and listed on the Address page.
Updating a Guarantor’s Contact Information
1. Navigate to the ECR > Show Menu > Guarantors > Click the Address button of the guarantor whose contact information needs updating. The Current Contact Information page appears.
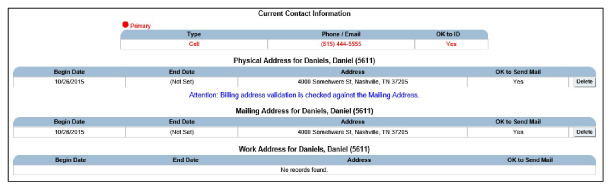
2. Click Update Contact Information in the status bar. The Current Contact Information page appears.
3. Update the needed information and click Submit in the status bar. The contact record is saved and listed on the address page.
Client guarantor information can be updated using the following process, except for the active date range. (See Tracking a Guarantor’s Date Range for information about its update.) |
1. Navigate to the ECR > Show Menu > Guarantors > Click the Select button that corresponds with the guarantor records needing an update. The Guarantor page appears.
2. After making the desired edits, click Submit in the status bar. The updated guarantor record is saved and listed on the Guarantors page.
Tracking a Guarantor’s Date Range
This task is used to track the date history of a guarantor’s active date range. Each time a guarantor’s active date range is modified, the system automatically records the name of the staff member who made the change and the date the change was made.
1. Navigate to the ECR > Show Menu > Guarantors > Click the Date Change button on the guarantor record whose date range needs an update. The Guarantor Coverage Date Change page appears.
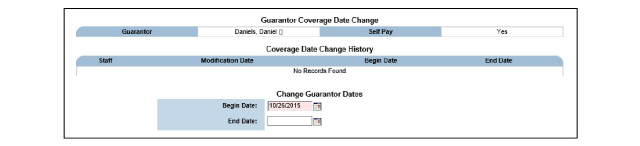
2. Update and click Submit in the status bar. The guarantor record is updated and will become inactive on any end date defined. The Guarantors page appears.
Deleting Client Guarantors is a privilege that can be completed by a System Administrator. |
Guarantor records that are not associated with active payers can be deleted. If a guarantor record is associated with an active payer, it cannot be deleted. Once a guarantor is associated with a payer, the Delete button on the Guarantors page is replaced by the text, “Payers Attached.”
1. Navigate to the ECR > Show Menu > Guarantors > Click the Delete button that corresponds to the guarantor record needing deletion. A confirmation pop-up appears.
2. Select OK to confirm deletion of the guarantor. The selected guarantor is deleted from the system.
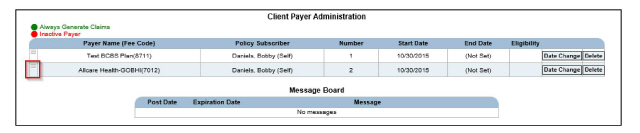
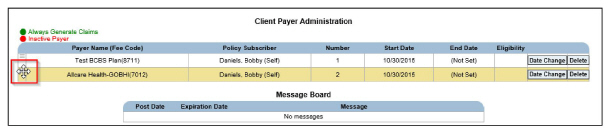
1. Navigate to the ECR > Show Menu > Payers. The Client Payer Administration page appears.
This page is used to perform the following tasks:
• Establishing Payer Priorities
• Modifying a Payer’s Active Date Range
Each client is required to have an active payer, or can be marked as self-pay on the Guarantors page. (See Adding Client Guarantors.) If multiple payers are set up, the payers can be prioritized to allow for waterfall billing.
Payer records are normally created through the Point of Entry module. (See the Point of Entry Guide.) |
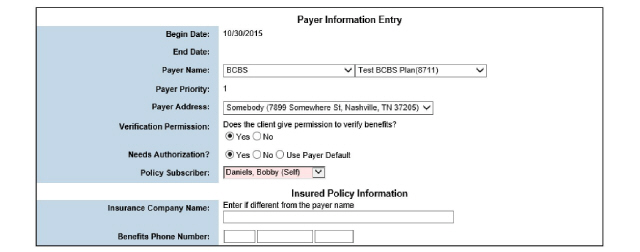
1. Navigate to the ECR > Show Menu > Payers > Add a Client Payer. The Payer Information Entry page appears.
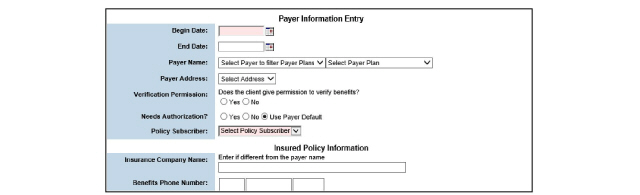
2. Fill out the required information and click Submit in the status bar. The payer record is saved and listed on the Client Payer Administration page.
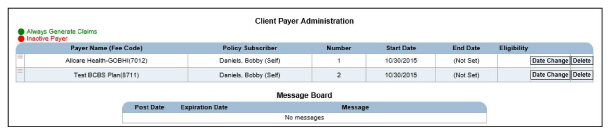
Payer priority is the order in which payers are billed for a service. If the payer assigned first priority does not reimburse for the full amount, the remaining balance can be billed to another payer plan. If a client has multiple payers in the system, CareLogic needs to know which to bill first. By default, the first payer entered into the system has the highest priority. The following payer entered gets second priority, and so on. Payer priority can be edited so that the correct payer is billed for each client.
1. Navigate to the ECR > Show Menu > Payers. The Number column lists the priority number associated with each payer plan.
2. Hover over the location button until the four-arrow icon is displayed, then drag the menu item to its new place.
1. Navigate to the ECR > Show Menu > Payers > Click the Payer Name or Policy Subscriber that corresponds with the payer plan needing an update. The Payer Information Entry page appears.
2. After making the desired edits, click Submit in the status bar. The updated client payer record is saved and listed on the Client Payer Administration page.
Client messages can be added throughout the system, to communicate information about clients to users.
1. Navigate to the ECR > Show Menu > Payers > Add Message. The Client Message Entry page appears.
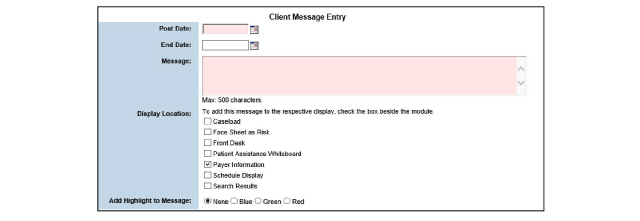
2. Fill out the applicable sections of the form and click Submit in the status bar. The client message is saved and listed in the Message Board section of the Client Payer Administration page.
Modifying a Payer’s Active Date Range
In order to update a payer plan’s date range, the date range must cover the open and closed claims for the client.
1. Navigate to the ECR > Show Menu > Payers > Click the Date Change button for the desired payer. The Change Client Payer Plan Dates page appears.
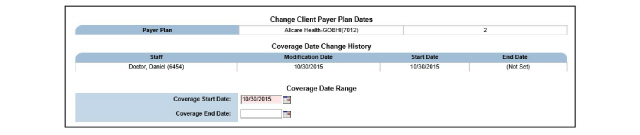
2. Enter the dates and click Submit in the status bar. The selected payer plan is updated and becomes inactive on the end date defined. The Client Payer Administration page appears.
Payer plans that are associated with claims cannot be deleted. Only payer plans that have not been used can be deleted.
If a payer plan was entered incorrectly, claims for that client and payer plan will need to be backed out. |
Deleting Client Payers is a privilege that can be completed by a System Administrator. |
1. Navigate to the ECR > Show Menu > Payers > Client Payer Administration > Click the Delete button that corresponds with the payer plan wanted. A confirmation screen appears.
2. Select OK to confirm deletion of the selected payer plan.
Maintaining Payer Authorizations
Some payer plans require authorization before providing services to clients. If a payer plan requires an authorization, the authorization number needs to be included on the claim or the payment will be denied.
If the client’s payer plan requires an authorization, the Claim Engine runs a check to confirm that an authorization number is included before the system creates a bill. (See the Billing and Accounts Receivable Guide for more information about the Claim Engine.) |
1. Navigate to the ECR > Show Menu > Payer Authorizations. The Payer Authorizations page appears.
If the system is configured to display modifiers, procedure code modifier combinations will be present in the Procedure Code(s) column. |

This page is used to perform the following tasks:
• Viewing the History of Authorization Statuses
• Viewing Services Not Authorized
• Updating Payer Authorizations
• Deleting Payer Authorizations
Payer Authorization records are normally created through the Point of Entry module. (See the Point of Entry Guide.) |
1. Navigate to the ECR > Show Menu > Payer Authorizations > Add Authorization. The Payer Authorization Information page appears.
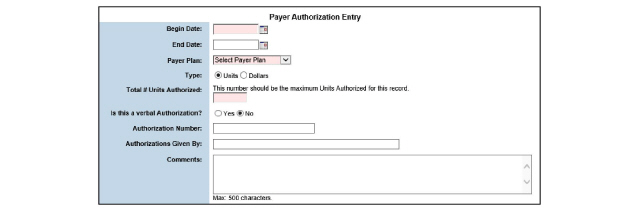
2. Fill out the needed information and click Submit in the status bar. The payer authorization record is saved and listed on the Payer Authorization Information page.
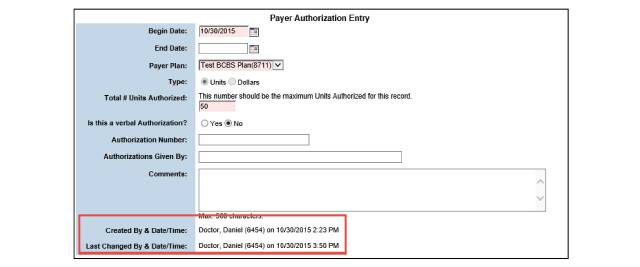
Viewing the History of Authorization Statuses
Each time the authorization status is changed on the Payer Authorization page, a new record is created. The Status History button is used to view a history of the authorization statuses.
1. Navigate to the ECR > Show Menu > Payer Authorizations > Click the authorization record desired. The Payer Authorization Entry appears. The history of the authorizations can be derived from the Created By & Date/Time and Last Changed By & Date/Time fields.
Viewing Services Not Authorized
This report can be printed as an Excel file by clicking the Print as XLS button in the status bar. |
1. Navigate to the ECR > Show Menu > Payer Authorizations > Services Not Authorized. The Services Without Authorizations page appears.

1. Navigate to the ECR > Show Menu > Payer Authorizations > Click the authorization record desired. The Payer Authorization Entry page appears. After making the desired edits, click Submit in the status bar. The updated payer authorization is listed on the Payer Authorizations page.
Caution should be exercised when deleting payer authorizations. If an authorization is deleted that covers outstanding services falling within its date range, the billing system will generate an error for the services. End dating a payer authorization is recommended, rather than deleting it. |
Once services are attached to an authorization they cannot be deleted.
1. Navigate to the ECR > Show Menu > Payer Authorizations > Click the Delete button for the authorization record desired. The Delete Authorization page appears.

2. Select Yes to confirm deletion and click Submit in the status bar. The selected payer authorization is deleted.
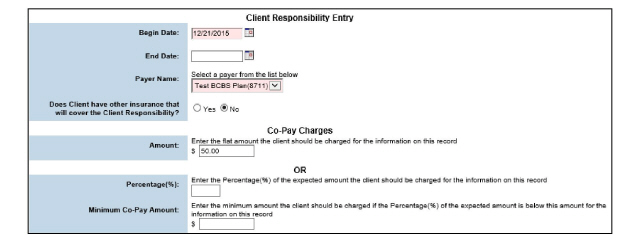
Maintaining Client Responsibility
A specific co-pay amount or percentage can be defined for each client payer. If a percentage is entered, the system uses the payer plan’s contracted rate to determine the co-pay amount.
Co-pay records are normally created through Point of Entry. (See the Point of Entry Guide.) |
1. Navigate to the ECR > Show Menu > Client Responsibility. The Active Client Responsibility page appears.

This page is used to perform the following tasks:
• Adding Client Responsibility
• Editing Client Responsibility
• Deleting Client Responsibility
When defining a client’s co-pay, an amount or a percentage can be entered, but not both.
1. Navigate to the ECR > Show Menu > Client Responsibility > Add Client Responsibility. The Client Responsibility Entry page appears.
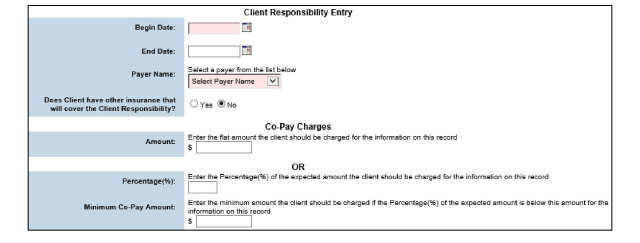
2. Fill out the needed information and click Submit in the status bar. The client co-pay record is saved and listed on the Active Client Responsibility page.
1. Navigate to the ECR > Show Menu > Client Responsibility > Click the payer needing to be edited. The Client Responsibility Entry page appears.
2. After making the desired edits, click Submit in the status bar. The updated co-pay record is saved and listed on the Co-Pay Information page.
Deleting Client Responsibility
Caution should be exercised when deleting client responsibility. If a co-pay is deleted that covers outstanding services falling within its date range, the billing system will generate an error for the services. End dating a co-pay record is recommended, rather than deleting it. |
1. Navigate to the ECR > Show Menu > Client Responsibility > Click the Delete button for the client co-pay record desired. A deletion confirmation appears.
2. Select OK to confirm deletion. The selected co-pay record is deleted from the system.
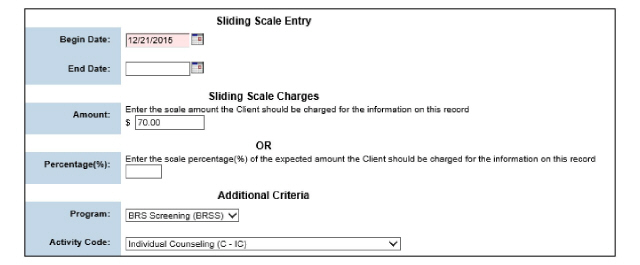
Sliding scales allow the definition of the maximum amount or percent charged for a program or activity, based on the client’s household income. Once a sliding scale is established, the billing system will not charge the client more than the amount or percentage defined.
1. Navigate to the ECR > Show Menu > Sliding Scale. The Client Sliding Scale page appears.

This page allows the following tasks:
When creating a sliding scale, the maximum amount or the maximum percentage to charge needs to be defined, but they cannot both be defined at the same time.
1. Navigate to the ECR > Show Menu > Sliding Scale > Add Sliding Scale. The Sliding Scale Entry page appears.
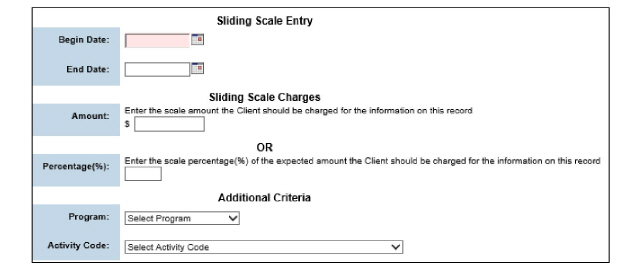
2. Fill out the needed information and click Submit in the status bar. The sliding scale is saved and listed on the Client Sliding Scale page.
1. Navigate to the ECR > Show Menu > Sliding Scale > Click the Select button for the sliding scale desired. The Sliding Scale Entry page appears.
2. After making the desired edits, click Submit in the status bar.
Caution should be exercised when deleting sliding scales. If a sliding scale is deleted that covers outstanding services falling within its date range, the billing system will generate an error for the services. It is recommended to end date a sliding scale rather than delete it. |
1. Navigate to the ECR > Show Menu > Sliding Scale > Click the Delete button for the sliding scale desired. The Delete Sliding Scale Entry page appears.

2. Select Yes to confirm deletions and click Submit in the status bar. The selected sliding scale record is deleted.
The Liability Matrix determines a client’s maximum monthly responsibility for payment. Payments for services are based on adjusted family income after deductions and residential status are taken into account.
Fees billed for client liability will be set to billed amount, not expected amount. |
Add a Client Liability Matrix Record
1. Navigate to the ECR > Show Menu > Client Liability. The Client Liability List appears.

2. Click Add Liability. The Client Liability Entry appears.

3. Enter information and click Submit. The entry is saved on the Active Client Liability List.
This chapter contains the following topics:
• Reviewing Financial Overview
• Viewing a Client’s Face Sheet
• Reviewing Financial Snapshots
• Reviewing Scheduled and Canceled Visits
• Search for Service Documents
• Printing Service Documents in Bulk Mode
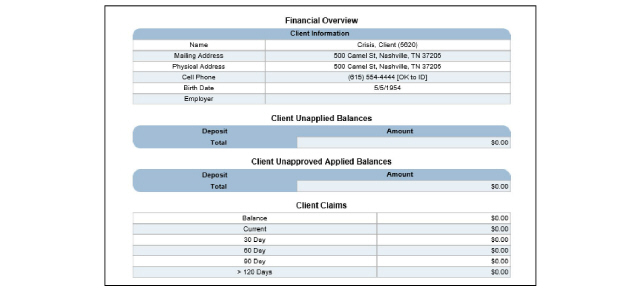
The Financial Overview is a summary view of the client’s account that contains unapplied money, unapproved money, and balances, organized by aging per each payer plan.
1. Navigate to the ECR > Show Menu > Financial Overview. The Financial Overview page appears.
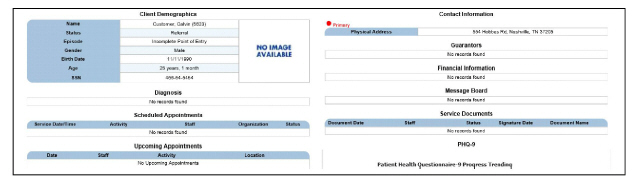
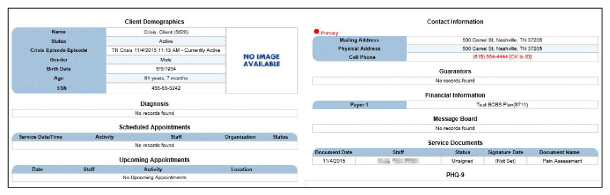
The Face Sheet provides general information about the selected client, which is pulled from associated pages or service documents.
1. Access the ECR module and the Face Sheet will appear.
The Service History module is used to view services that a client has received.
1. Navigate to the ECR > Show Menu > Service History. The Client Inquiry Service History page appears.
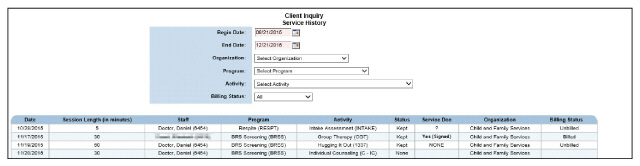
2. Use the filters and click Submit, if needed. The Client Inquiry Service History page is refreshed and lists the services that were delivered to the client during the defined date range.
The Financial Snapshot module provides a 90 day view of transactions that have been approved, including claims, payments, and adjustments.
1. Navigate to the ECR > Show Menu > Financial Snapshot. The Financial Snapshot page appears.
All approved payments are indicated with red text. Unapplied and unapproved payments are not included in this module. To view unapplied and unapproved payments, use the Financial Overview module. (See Reviewing Financial Overview.) |

2. Use the filters and click Submit, if needed. The Client Inquiry Transaction History page is refreshed and lists the transactions for the defined date range.
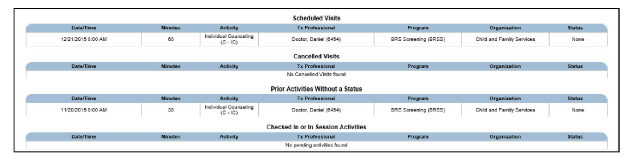
Reviewing Scheduled and Canceled Visits
1. Navigate to the ECR > Show Menu > Scheduled/Canceled Visits. The Scheduled/Cancelled Visits page appears.
Using the Medications List Filter
The Medications List filter defaults to the past 30 days. The filter will change the medications shown in the list based on medication status and active date selections.
1. Navigate to the ECR > Show Menu > Medications. The Client Medications page appears. Change filter selections and click Submit, if needed.

Orders module - If the system is configured to use Medication Orders with a third party, a medication will be listed as active when the doctor’s order is entered in the Medications module.
Medications module - The Medications module allows manual addition of medications to the client’s Medication History page.
The Medication page can be configured to display Current Client Medications and Inactive Client Medications alone. Or, the Medications page can be divided into four sections in the following way:
• Current Client Internal Medications - Lists active medications prescribed through the Medication Order or Medications module.
• Current Client External Medications - Lists active medications prescribed through e- prescription.
• Inactive Client Internal Medications - Lists discontinued or expired medications prescribed through Medication Order or Medications module.
• Inactive Client External Medications - Lists discontinued or voided medications prescribed through e-prescription.
Contact Qualifacts support for help with configuring the Medications module.
Any medications listed in red text indicate a potential overdose danger and should be used as a caution for staff members. |
This functionality is available only if the client is not using a third party E-prescribing service. |
1. Navigate to the ECR > Show Menu > Medications > Add Medication. The Client Medication Entry page will appear.
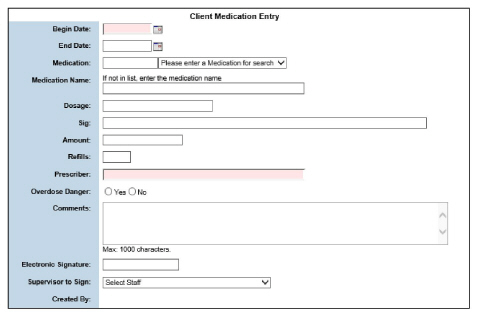
2. Complete the needed information and click Submit.
CareLogic differentiates between clients who are not taking any medications and those whose medications have not yet been documented. The No Current Medications button will be displayed for selection whenever there are no current medications listed.
Clicking the No Current Medications button will display a note between the filter and the medications list. Entering a medication will remove the No Current Medications status.

If a medication is listed and is active (it has not been end dated or the end date is in the future) or a medication is added, the button will not be displayed.
The purpose of Medication Reconciliation is to gather and record medication information a patient may be receiving from another setting of care or provider.
The Medication Reconciliation module consists of a reconciliation entry form and a reconciliation history.
A third party vendor to prescribe and record medications must be enabled for Medication Reconciliation to be enabled. |
Enter a Medication Reconciliation
1. Navigate to ECR > Show Menu > Medications > Manual Medication Reconciliation. The Reconciliation Entry page appears.
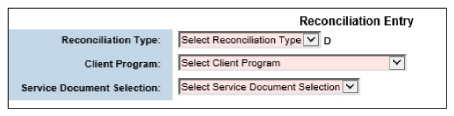
2. Fill out the needed information and click Submit. The Manual Medication wizard appears.
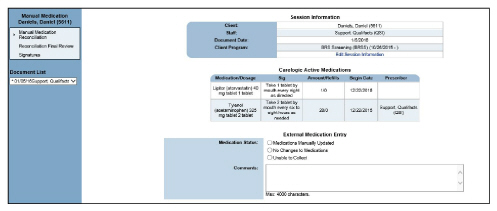
3. Click Manage Medications to add to CareLogic Active Medications through the Third Party E-Prescribing software. Click Submit to progress through the wizard.
View Medication Reconciliation History
1. Navigate to the ECR > Show Menu > Medications. Current medications appear under Client Medications.

2. To see any deleted medications, click View Deleted Medications.

Medication Consent is a configuration that provides records for each medication prescribed for a client. Accessing the consent process displays all medications without consents in the consent type page. Each medication is displayed in each consent type. Selections are limited to one consent type per prescription. Contact Qualifacts Support if Medication Consent functionality is needed.
A signature pad must be available to capture client signatures. |
Record a Current Medication Consent
The Medication Consent service document is highly customizable. This procedure is representative but may differ from organization to organization. Contact a system administrator with any questions. |
1. Navigate to the ECR > Show Menu > Medications > Consent. The Consent Type page appears.
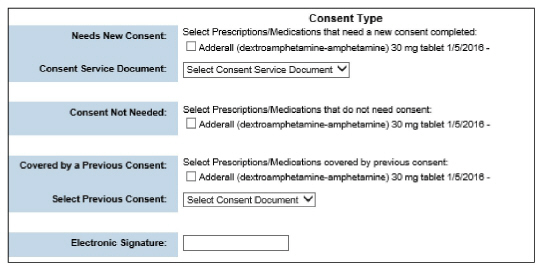
2. Complete the form and click Submit. The consent record will be locked and a consent report button bearing the consent date will be displayed in the medications list.
Make a Pending Medication Consent Complete
If a Medication Consent service document is exited before completion, the medications list will display a Pending button in the consent column. Clicking any Pending button will open the Medication Consent service document and display pending consents.

Pending consents can only be removed from within the consent service document.
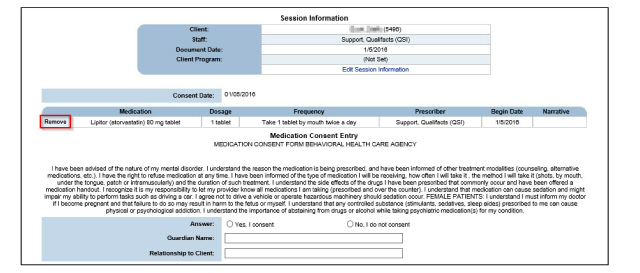
Click the Remove button in the Medication Consent service document. This will remove the Pending button and status from the medication record.
Some medications may not require consent. This can be noted to ensure medications were checked for consent requirements.
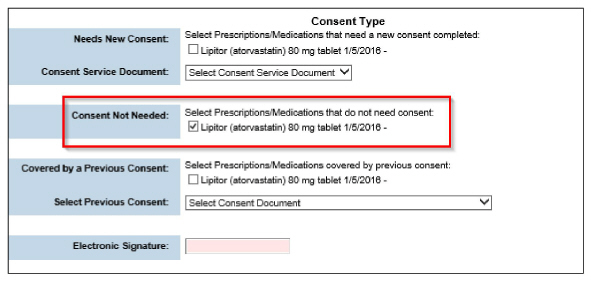
Select any medications not needing consent, enter an electronic signature, and click Submit. The consent record will be locked and a text note stating consent not needed will be added to the medication record.
The user will be able to select which previous consent the medication was consented under and an addendum will be created.
1. Check the medications covered under a previous consent and select the consent record.
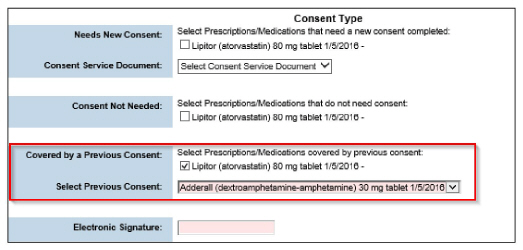
2. Enter an electronic signature and click Submit. The consent record will be locked and a consent report button bearing the consent date will be displayed in the medications list
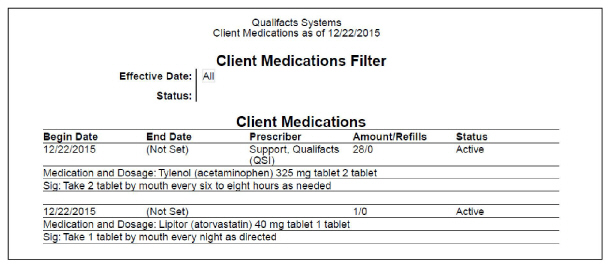
Print a Client Medications Report
There are two views of the Medications module. One, which is normally configured under the Inquiry Column in the ECR menu, is used for review purposes only. The other, which is normally configured under the Clinical Record column, contains the Print button described below. Medications module - Inquiry = inquiry_medication$.list?P_CLIENT_ID=::CLIENT_ID:: Medications module - Editable = client_medication$.list?P_CLIENT_ID=::CLIENT_ID:: |
1. Navigate to the ECR > Show Menu > Medications > Print. A printable PDF appears.
The Service Document Search module allows the user to search for service documents that contain a particular module.
1. Navigate to the ECR > Show Menu > Service Document Search. The Service Document Module Search page appears.

2. Fill out the fields and click Submit in the status bar. The system accesses the service documents that contain the selected module for the defined date range.
Printing Service Documents in Bulk Mode
The Service Document Reporting module is used to print service documents in bulk mode.
1. Navigate to the ECR > Show Menu > Service Document Reporting. The Service Documents - Bulk Reporting page appears.

2. Fill out the date fields, select the needed service documents and click Submit in the status bar. The report is created in PDF format.
Black Box Administration helps guarantee a client’s privacy. By setting black box access privileges, it is possible to control which staff members have access to a client’s ECR. Black Box privileges are set on an individual client basis.
Black Box Administration has three access options:
• Full Access - Gives access to all client functionality.
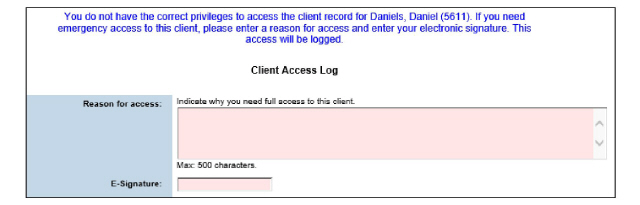
• Logged Access - Gives staff members access to all client functionality, but requires that the Access Log is completed and signed.
• No Access – Denies staff all access to the client’s information.
Each access option can be set for three staff options:
• None - Blocks use of that access option.
If None is selected for Full Access, all staff will be required to log access. If both Full Access and Logged Access are set to None, the client’s ECR will not be able to be accessed. |
• Specific Staff - Allows Black Box privileges to be set on an individual basis.
• All Other Staff - Sets the Black Box privileges for any staff not specified in other options. The All Other Staff selection can only be used for one option.
In order to set up Black Box Administration, a staff member must have Black Box Administration privileges. |
It is recommended to add staff to Full Access or Logged Access before setting the No Access option. Setting the No Access option first could result in all staff being locked out of the client’s ECR. |
Set Access Level by Exclusion, Selection, or by Group
1. Navigate to the ECR > Show Menu > Black Box Administration. The Black Box Administration page appears.
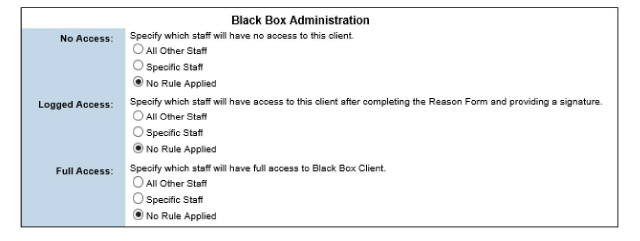
2. Select No Rule Applied to exclude the level of access. Select All Other Staff to include all staff as the default. Select Specific Staff to give the privilege level to a named list of employees and a box will appear to add the staff.
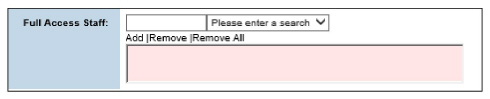
3. Add staff and click Submit.
A staff member can only be added to the specific staff list of one of the access options. If the user attempts to add a staff member to more than one access option an error message will display. |
1. Navigate to the ECR. Results will depend on access privilege level:
• Full Access - The Face Sheet will be displayed.
• Logged Access - An error message appears in the status bar and the Client Access Log appears. The Client Access Log must be completed and signed to continue to the ECR.
• No Access - An Access Denied message will be displayed and the attempted access will be recorded in the Audit Log.

1. Navigate to the ECR > Show Menu > Client Episodes (Episodes of Care in some systems). The Client Episodes page appears.

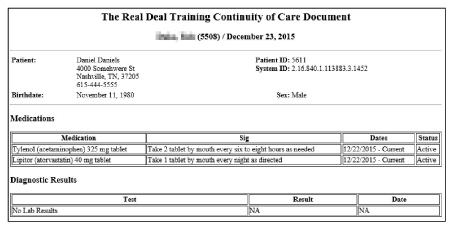
Continuity of Care allows providers to provide clients with an electronic or paper record of their health information. This record can describe a single encounter or multiple encounters with a client.
The Continuity of Care Document will contain the following information:
• Allergies
• Encounters (Service History)
• Immunizations
• Medications
• Plan of Care (Future Scheduled Appointments)
• Problems
• Social History
• Vitals
Create a Continuity of Care Document
1. Navigate to the ECR > Show Menu > Continuity of Care. The Continuity of Care Document page appears.

2. Click Create CCD in the shortcut bar. The Continuity of Care Document Entry page will be displayed.
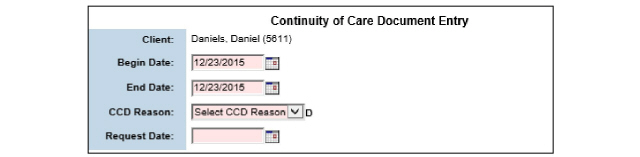
3. Fill in fields and click Submit. The report is saved on Continuity of Care Document page.
View and Print the Continuity of Care Document
1. Navigate to the ECR > Show Menu > Continuity of Care > Click the Print button for the desired Continuity of Care document. A download dialog box appears.
2. Download the document and print if needed.
Receive a Continuity of Care Document
Received Continuity of Care documents are uploaded to the ECR through the document library. Refer to Using the Document Library for details.
The object of Clinical Quality Measures is to report ambulatory clinical quality measures to Centers for Medicare and Medicaid Services.
Entering Clinical Quality Measures
Each module must be included in a service document before it can be used. Since service documents vary widely, a standard path cannot be shown here. Most Clinical Quality Measures can be completed with the following process:
1. Navigate to the proper service document.
2. Enter the required information and click Submit.
The following Clinical Quality Measures follow the process:
• Complete Adult Weight Screening and Follow-Up
• Complete Blood Pressure Management
• Complete Preventative Care: Tobacco
• Complete Preventative Care: Influenza
• Complete Weight Assessment and Counseling for Children and Adolescents
• Complete Childhood Immunization Status
• Complete Initiation and Engagement of Alcohol and Other Drug Dependence Treatment
• Complete Anti-depressant Medication Management
• Complete Smoking and Tobacco Use Cessation, Medical Assistance
The Orders module allows in-patient and residential treatment facilities to track the type of clinical orders that are requested by doctors. Clinical orders can be created through the stand-alone Orders module (as described in this chapter) or through service documents. (To set up orders through service documents, see the System Administrator Guide.)
This chapter includes the following topics:
• Creating Orders Through CareLogic
• Creating Standing Order Protocols
Creating Orders Through CareLogic
Before orders can be entered into the system, they must be configured by the system administrator. (See the System Administrator Guide.)
Once billable order types are properly configured, the Claim Engine will process them in the same manner as scheduled activities. After the order activities are converted to claims, they can be batched and sent out for billing.
Order privilege levels are set up through the Orders Administration module. (See the System Administrator Guide.) Orders privilege levels determine which staff members are able to order, sign orders, enter orders into the system, and access orders in read-only mode. |
In order to bill for any type of order, it must be configured by the system administrator. The Claim Engine will process orders in the same manner as scheduled activities. After the order activities are converted to claims, they can be batched and sent out for billing. (See the System Administrator Guide for instructions about configuring billable orders.) |
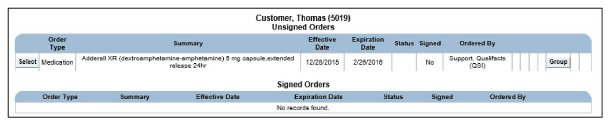
1. Navigate to the ECR > Show Menu > Orders. The Orders page appears, which lists signed and unsigned orders for the selected client.

This page allows the creation of the following type of orders:
• Administering Medications Through MAR
• Tracking Patient Assistance for Medications
• Creating Seclusion or Restraint Orders
• Creating Automated Lab Orders
• Creating DME (Durable Medical Equipment) Orders
• Creating Consultation Orders
• Creating Activity Level Orders
The account used to create medication orders will need to have full access to Third Party E-Prescribing software used to manage medications. |
1. Navigate to ECR > Show Menu > Orders > Create New Order > The Orders page appears.
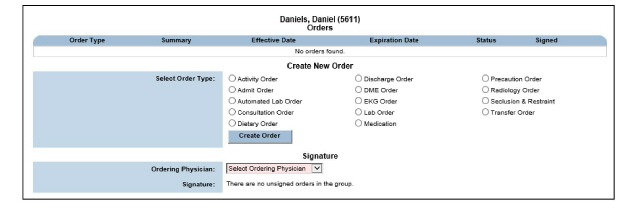
2. In the Select Order Type field, select the Medication radio button and click the Create Order button. The Third Party E-Prescribing software appears.
3. Fill out the needed information in the Third Party E-Prescribing software. The medication order is saved and is listed on the Orders page.
Administering Medications Through MAR
In order to enter medication administration records through MAR, staff members must have the MAR Write privilege level. |
Allergies and Medications need to be entered before MAR can be used. |
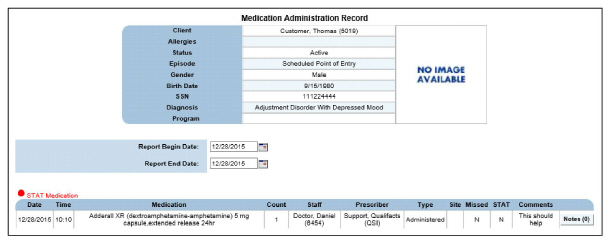
The Medication Administration Record (MAR) serves as a legal record for the medications administered to clients. Once a medication order is signed, the system creates a MAR record in the ECR. This informs staff that medication needs to be administered to the client.
Once a MAR record is created, a nurse or other qualified staff member administers the medication and then complete the MAR record. Each medication record that is created is electronically signed by a qualified staff member at the time the medication is administered to the client.
After a medication is administered to a client, it appears in read-only mode through the client’s MAR. All staff members who have access to the client’s ECR will have access to the client’s read-only MAR.
CareLogic may be configured to capture measurements in metric or US units. Contact QSI Support for more information about this configuration. |
1. Navigate to the ECR > Show Menu > MAR. The Medication Administration Record page appears.
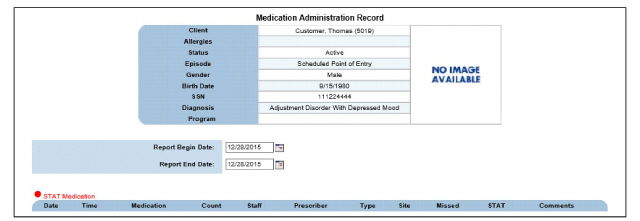
2. Click Add MAR Entry in the status bar. The Medication Administration Record data entry page appears. This page lists medications that have been ordered for the selected client.
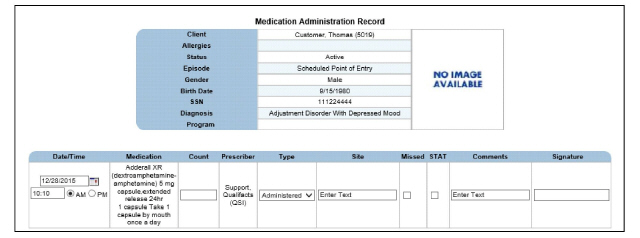
3. Fill out the needed information and click Submit in the status bar. The medication record is saved and listed on the Medication Administration Record page.
Tracking Patient Assistance for Medications
Patient assistance programs are funded by pharmaceutical companies to provide low-income clients with medications at no cost. The Patient Assistance module is used to track which clients are on patient assistance.
1. Navigate to the ECR > Show Menu > Patient Assistance. The Client Demographics page appears.
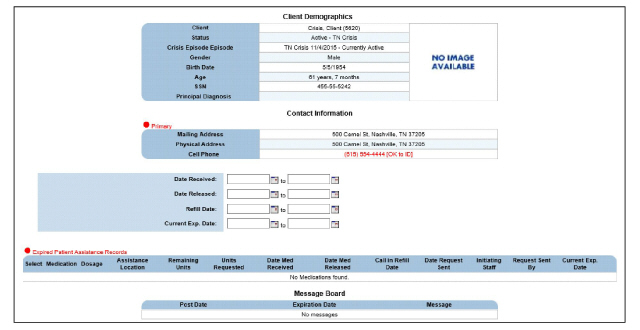
2. Click Add Patient Assistance in the status bar. The Client Demographics page changes to data entry mode.
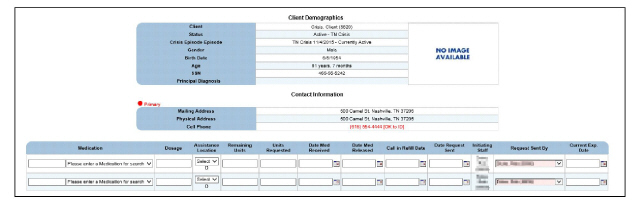
3. Fill out the information and Submit in the status bar. The patient assistance record is saved and listed on the Client Demographics page.
Use the Patient Assistance Whiteboard to view the clients receiving patient assistance. (See Using the Patient Assistance Whiteboard) |
Creating Seclusion or Restraint Orders
1. Navigate to the ECR > Show Menu > Orders > Create New Order > In the Create New Order section, select the Seclusion or Restraint radio button and click the Create Order button. The Seclusion or Restraint Order page appears.
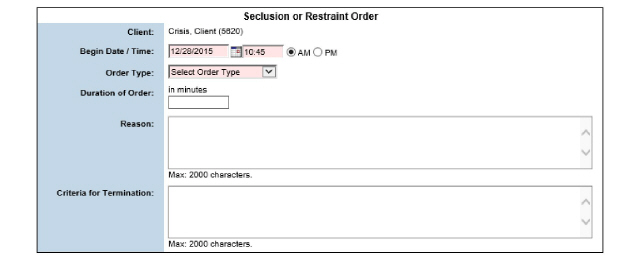
2. Fill out the needed information and click Submit in the status bar. The seclusion or restraint order is saved, listed on the Orders Group page, and becomes a part of the current order group.
1. Navigate to the ECR > Show Menu > Orders > Create New Order > In the Create New Order section, select the Lab Order button and click the Create Order button. The Lab Order Form appears.
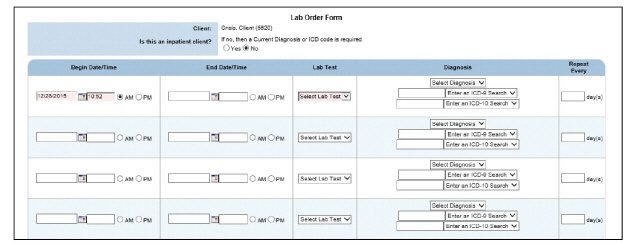
2. Fill out the needed information and click Submit in the status bar. The lab order is saved, listed on the Orders Group page, and becomes a part of the current order group.
Automated Lab Order privilege levels are set up through the third party E-prescribing service enrollment process. If an error message is received when creating an Automated Lab Order, contact the system administrator to ensure the proper privilege levels are in place. |
1. Navigate to the ECR > Show Menu > Orders > Create New Order > In the Create New Order section, select the Automated Lab Order radio button and click the Create Order button. The third party E-prescribing service page appears.
2. Fill out the needed information and click the Next button. The automated lab order is saved, listed on the Orders Group page, and becomes a part of the current order group.
1. Navigate to the ECR > Show Menu > Orders > Create New Order > In the Create New Order section, select the Radiology Order radio button and click the Create Order button. The Radiology Order Form appears.
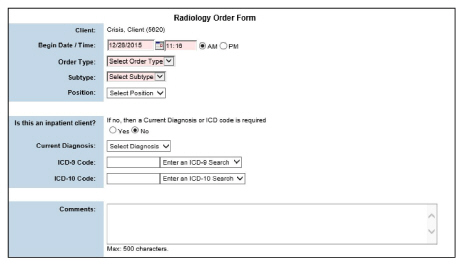
2. Fill out the needed information and click Submit in the status bar. The radiology order is saved, listed on the Orders Group page, and becomes a part of the current order group.
Creating DME (Durable Medical Equipment) Orders
1. Navigate to the ECR > Show Menu > Orders > Create New Order > In the Create New Order section, select the DME Order radio button and click the Create Order button. The DME Order Form appears.
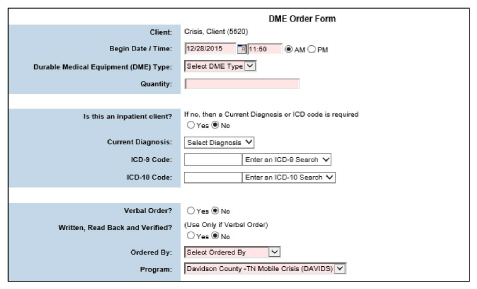
2. Fill out the needed information and click Submit in the status bar. The DME Order is saved, listed on the Orders Group page, and becomes a part of the current order group.
1. Navigate to the ECR > Show Menu > Orders > Create New Order > In the Create New Order section, select the EKG Order radio button and click the Create Order button. The EKG Order Form appears.
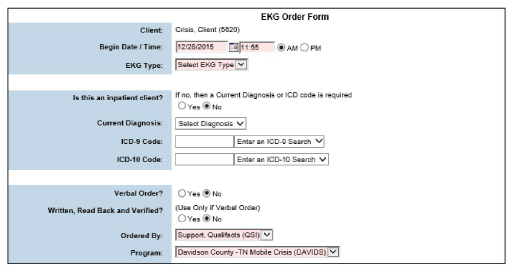
2. Fill out the needed information and click Submit in the status bar. The EKG Order is saved, listed on the Orders page, and becomes a part of the current order group
1. Navigate to the ECR > Show Menu > Orders > Create New Order > In the Create New Order section, select the Consultation Orders radio button and click the Create Order button. The Consultation Order Form appears.
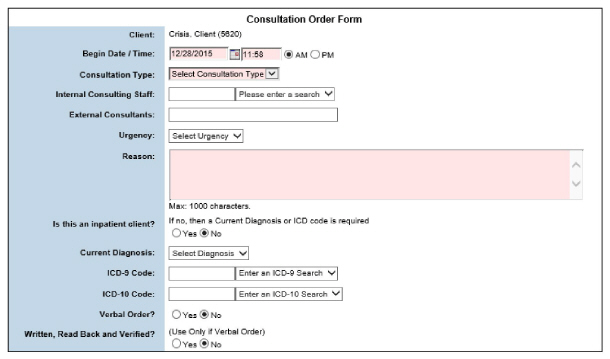
2. Fill out the needed information and click Submit in the status bar. The consultation order is saved, listed on the Orders Group page, and becomes a part of the current order group.
1. Navigate to the ECR > Show Menu > Orders > Create New Order > In the Create New Order section, select the Transfer Order radio button and click the Create Order button. The Transfer Order page appears.
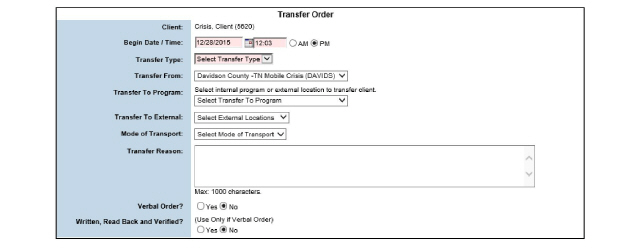
2. Fill out the needed information and click Submit in the status bar. The transfer order is saved, listed on the Orders page, and becomes a part of the current order group.
1. Navigate to the ECR > Show Menu > Orders > Create New Order > In the Create New Order section, select the Admit Order radio button and click the Create Order button. The Admit Order Form appears.
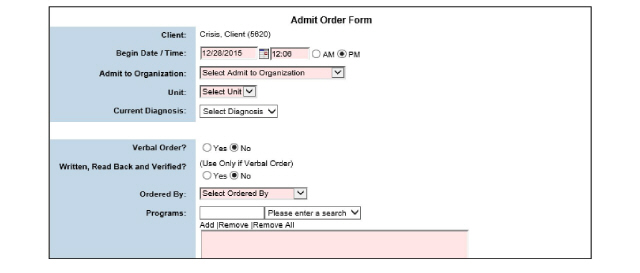
2. Fill out the needed information and click Submit in the status bar. The admit order is saved, listed on the Orders page, and becomes a part of the current order group.
When discharging clients from outpatient treatment programs, the Program Management module is recommended rather than using a discharge order. (See Transfer and Discharge.) |
Although it is available for outpatient services, the discharge order is designed for discharging clients from inpatient services. The discharge order captures the necessary information for the UB-04 and 837I.
1. Navigate to the ECR > Show Menu > Orders > Create New Order > In the Create New Order section, select the Discharge Order radio button and click the Create Order button. The Discharge Order wizard appears, with the Discharge Order Form displayed.
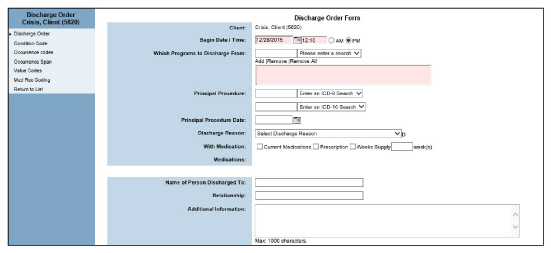
2. Fill out the needed information and click Submit in the status bar. The discharge order is created and the Condition Codes page appears.
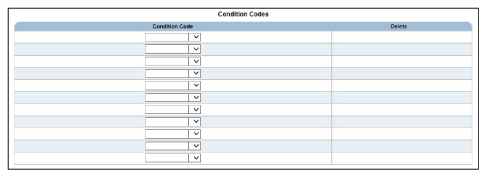
3. Fill out the information and click Submit in the status bar. The condition code values are saved and the Occurrence Codes page appears.
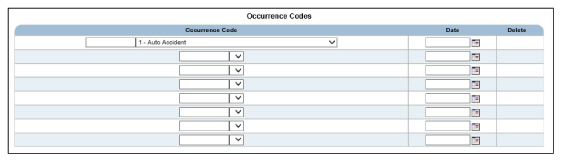
4. Fill out the needed information and click Submit in the status bar. The occurrence code values are saved and the Occurrence Span page appears. Occurrence spans consist of a code description and a date range that are used to identify an event which relates to the payment of the claim.

5. Fill out the information needed and click Submit in the status bar. The occurrence span values are saved and the Value Codes page appears.
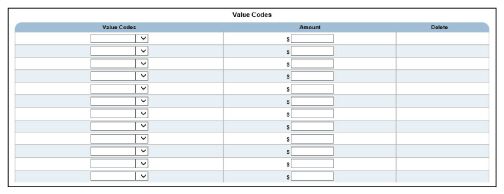
6. Fill out the needed information and click Submit in the status bar. The Med Rec Coding page appears.

7. Fill out the needed information and click Submit. The discharge order is saved, listed on the Orders page, and becomes a part of the current order group.
Creating Activity Level Orders
Once the activity level order reaches its final status and is signed, a red R appears in the title bar beside the client’s name in the ECR. This is a visual indicator that alerts the staff to an activity restriction.
1. Navigate to the ECR > Show Menu > Orders > Create New Order > In the Create New Order section, select the Activity Order radio button and click the Create Order button. The Activity Level Order Form appears.
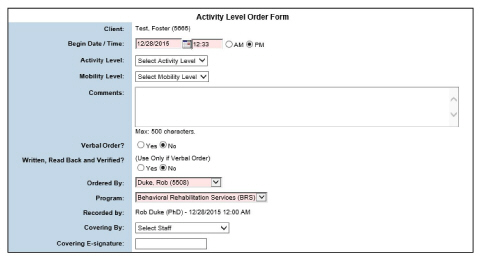
2. Fill out the needed information and click Submit in the status bar. The activity level order is saved, listed on the Orders Group page, and becomes a part of the current order group.
1. Navigate to the ECR > Show Menu > Orders > Create New Order > In the Create New Order section, select the Dietary Order radio button and click the Create Order button. The Dietary Order Form appears.

2. Fill out the needed information and click Submit in the status bar. The dietary order is saved, listed on the Orders Group page, and becomes a part of the current order group.
1. Navigate to the ECR > Show Menu > Orders > Create New Order > In the Create New Order section, select the Precaution Order radio button and click the Create Order button. The Precaution Order Form appears.
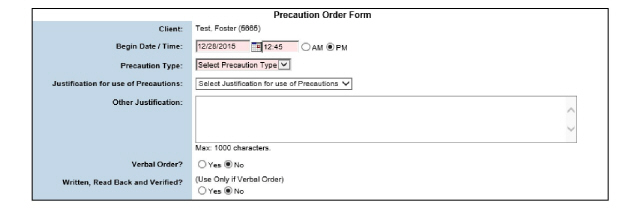
2. Fill out the needed information and click Submit in the status bar. The precaution order is saved, listed on the Orders Group page, and becomes a part of the current order group.
Creating Standing Order Protocols
In order to create Standing Orders Protocol (SOPs) for clients, the SOPs must be set up through the Administration tab. (See Standing Order Protocols in the System Administrator Guide) |
SOPs can consist of any number of individual orders. They are beneficial to organizations that use a defined set of orders for similar clients. For example, if an organization’s admission process requires a lab order, a consultation order, and an admit order, an Admission SOP can be created that consists of these three order types. This section includes instructions for creating SOPs for clients.
1. Navigate to the ECR > Show Menu > Orders > Create New Order. If the SOP is set up correctly it will be displayed under Create New Order.
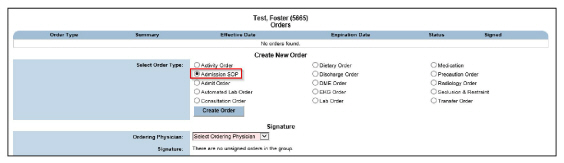
2. Select the radio button of the SOP needing creation and click the Create Order button. The SOP wizard opens for the selected SOP. The SOP wizard, which appears in the left pane, contains a link for each individual order within the SOP. Notice that required orders are listed in bold, red text.

3. Complete each order within the SOP and click Submit. The wizard will progress through the orders in turn. Required orders must be completed in order to submit the SOP. Click the Sign & Complete SOP link. The Signature page appears.

4. Fill out the needed information and click Submit in the status bar. The SOP record is saved and listed on the Orders page.
This section contains the following topics:
• Selecting the Next Order Status
• Associating Orders with Service Documents
Each time an order is entered into the system it becomes part of the current order group. Once an order group is accessed, any number of orders can be added to the group. Every order is automatically associated with the currently selected group. A group can consist of a single order or multiple orders.
The system creates order groups as a means for managing the orders. Orders within the group can be renewed and signed in bulk.
1. Navigate to the ECR > Show Menu > Orders > Click the Group button of the order wanted to access. The Orders Group page appears.
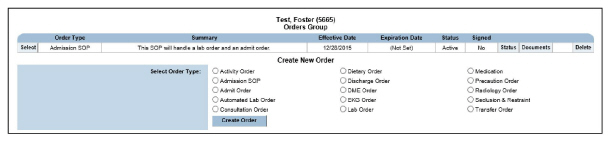
As long as an order has not been signed, it can be updated from either the Orders page or the Orders Group page. The following example will show how to update from the Orders page.
1. Navigate to ECR > Show Menu > Orders > Click the Select button that corresponds with the order needing an update. The corresponding order page appears.
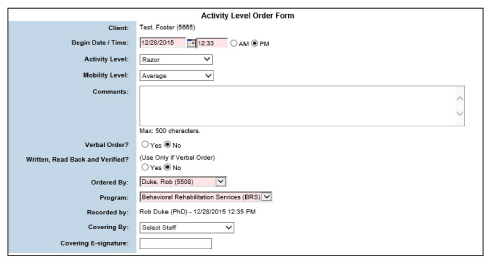
2. After making the desired edits, click Submit in the status bar. The updated order is saved.
Selecting the Next Order Status
The Administration Orders module is used to configure the status life cycle for each order type. (See the System Administrator Guide.)
Billable orders will not be processed by the Claim Engine until they reach their end order status state. |
1. Navigate to ECR > Show Menu > Orders > Click the Status button for the order needing a new status. The Status History appears.

2. In the Next Order Status field, select the status to which the selected order will change and click Submit. The new order status is assigned to the order, and the Status History section is refreshed to reflect the new order status.
The order status options available in the Next Order Status drop-down list are set up in the Orders Administration module. (See the System Administrator Guide.) |
Associating Orders with Service Documents
In order to associate an order with a service document, the order must be properly configured through the Orders module. (See the System Administrator Guide.)
1. Navigate to the ECR > Show Menu > Orders > Click the Doc button for the desired order. The Service Documents Associated with the selected order page appears.

2. Fill out the needed information and click Submit in the status bar. The selected service document opens.
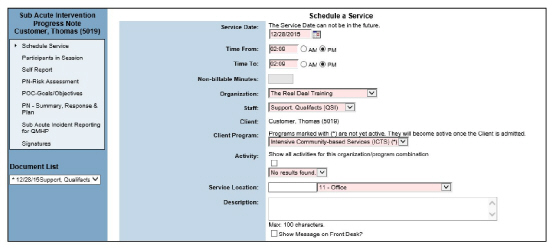
3. Complete the service document, click Submit in the status bar. The service document is listed on the Service Documents Associated with the page.

The renewal process is used to create a new order by making a copy of an existing order. Both active and pending orders can be renewed. When an order is renewed, the system creates a new pending order. The following rules are used to determine the effective and expiration dates for the original and new order.
• If the original order does not have an expiration date defined, the current system date is automatically set as the expiration date for the original order.
• If the original order has an expiration date defined, it remains effective until the expiration date arrives.
• The effective date for the new order is automatically set to the current system date.
• The expiration date for the new order is determined by the date range of the original order. The new order inherits the same number of days for its effective and expiration dates as the original order. For example, if the original order’s date range is five days, the new order’s effective date is set to the current system date and the expiration date is set to five days from the current system date.
When an order is renewed, the new order is unsigned, regardless of whether the original order was signed or not. |
1. Navigate to the ECR > Show Menu > Orders > Click the Renew button for the desired order. The Renew Order Confirmation page appears.

2. Select Yes to confirm the selected order and click Submit in the status bar. The effective and expiration dates for the original and new order are set according to the rules listed above.
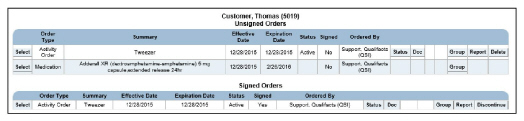
An order is considered inactive if it has a past effective and expiration date and it has been signed.
1. Navigate to the ECR > Show Menu > Orders > Show Inactive. The Inactive Orders page appears, which lists all inactive orders for the selected client.

2. After reviewing the inactive orders, click Show Active in the button bar to return to the Orders page.
When an order group is renewed in bulk from the Orders Group page, all of the active orders in the order group are renewed and the corresponding number of pending orders are automatically created. When an order group is renewed in bulk, a new order group is created for the new pending orders. This means the original orders and the new orders are in two different order groups.
1. Navigate to the ECR > Show Menu > Orders. The Orders page appears. The user may click Bulk Renewal here to renew all active orders or click Group to access the Orders Group page, then Bulk Renewal to renew only the orders in one group. The Active Orders Renewal page appears.

2. Select the check boxes of the orders needing renewal and click Submit in the status bar. The selected orders are renewed and listed as pending orders.
Once an order is signed, it is locked and cannot be modified. The only change that can be made to an order once it is signed is the order status.
1. Navigate to ECR > Show Menu > Orders > Sign Pending. The Pending Orders page appears.
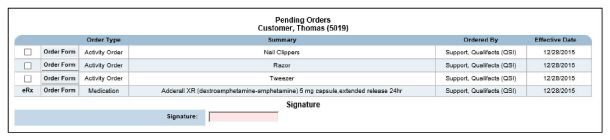
2. Check the boxes of the orders needing to be signed, enter the signature in the Signature field, and click Submit in the status bar.
When the signed order record is selected, the Recorded By field lists the name and credentials of the staff member who made the order and the date and time the order was signed. |
Orders can be discontinued only if an expiration date has been defined and the order has been signed. |
1. Navigate to the ECR > Show Menu > Orders > Click the Discontinue button that corresponds with the order desired. The Discontinue Order Confirmation page appears.

2. Select Yes to confirm discontinuation of the selected order and click Submit. The selected order is listed as Discontinued.
Once an order has been signed, it is active and cannot be deleted. Only pending orders can be deleted.
1. Navigate to the ECR > Show Menu > Orders > Click the Delete button for the order needing deletion. The Delete Order Confirmation page appears.

2. Select Yes to confirm deletion and click Submit in the status bar. The selected order is deleted and removed from the system.
CareLogic gives organizations the flexibility to build their own service documents. Service documents can be configured to meet the specific needs of any treatment facility. (See the System Administrator Guide.)
This chapter describes the basic tasks associated with service documents. The following topics are included in this chapter:
• Manually Attach Service Documents to Activities
• Associate a Service Document with a Program
• Create an Order Through a Service Document
• Schedule an Activity Through a Service Document
• Delete Unsigned Service Documents
• Access Completed Service Documents from Within a New Service Document
• Service Document Copy Forward
• Copy Forward Configurable Form Fields
• Add an Addendum to Service Documents
• Accept or Reject a Signed Service Document
• Delete Signed Service Documents
• Complete Service Document Groups
Manually Attach Service Documents to Activities
Every activity that is set up in the system must have a corresponding service document crosswalk record. (See the System Administrator Guide.)
The process of attaching a service document to an activity is available only if there are no activities currently associated with the service document. The activity must be marked as Kept and the service document must have been completed in the ECR in order to manually attach them together. |
1. Navigate to the ECR > Show Menu > Click the service document needing attachment.

2. Click the Attach button. The Activities without Documentation page appears.

3. Click the Attach button to associate the service document with the activity. The service document is attached to the selected activity. The Web browser is refreshed to display the service document page. A confirmation message appears in the button bar, and the Attach button is replaced with an Unattach button.
Associate a Service Document with a Program
Program Selection in a service document allows the service document to be associated with a program if it is completed separately from activity documentation. This is important if the service document should be included in state reporting.
1. Access the ECR > Show Menu > Click the service document needing association with a program. Click the Add a (name) button in the status bar. The Wizard for the service document appears, with Session Information as the first section on the first page.
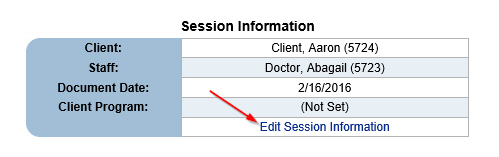
2. Click the Edit Session Information link. A pop-up appears.
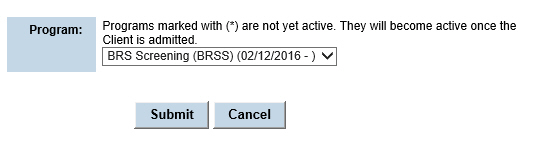
The Edit Session Information link will only be displayed if the program selection is required and the service document is not attached to an activity. |
The drop down list will only display active programs for the client. |
3. Select a program from the drop down list and click Submit. The first module in the service document will available to complete.
Create an Order Through a Service Document
When setting up service documents, it is possible to link them to the Orders module. (See the System Administrator Guide.) When this feature is enabled, an order can be created directly from the service document.
When orders are created through service documents, they are linked to the service document. Orders are not a part of service documents. The orders that are created through service documents must be signed separately. |
1. Access a service document that has been configured with the Orders module enabled.
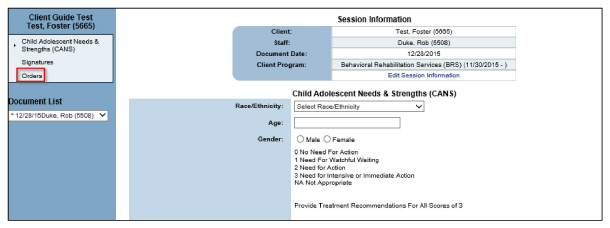
2. Click the Orders link in the left pane. The Orders Group page appears. See Clinical Orders for detailed instructions about using the Orders module.
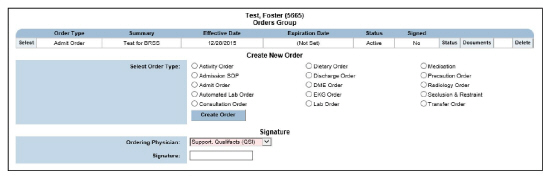
Schedule an Activity Through a Service Document
When setting up service documents, they can be configured so that activities can be scheduled through them. (See the System Administrator Guide.) This allows staff members to meet with unscheduled clients, then schedule the activity when they complete the service document. When an activity is scheduled through a service document, it is automatically marked as Kept, which means it will be processed by the nightly run of the Claim Engine.
Scheduling a service through a service document still must pass scheduling validation (see the Schedule Guide) and Scheduling Rules (see the System Administrator Guide). |
1. Access a service document that has been configured to schedule an activity.
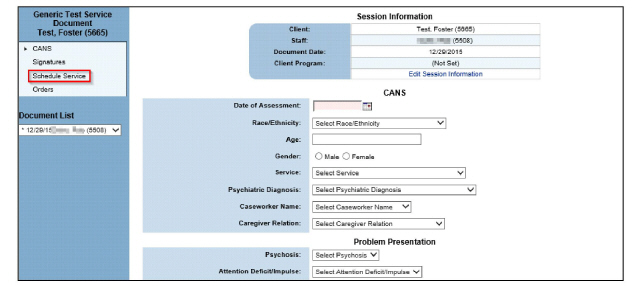
2. Click the Schedule Service link in the left pane. The Schedule a Service page appears.

3. Fill out the needed information and click Submit in the status bar. The activity is saved and the status of the activity is marked as Kept. During the nightly run of the Claim Engine, the activity will be processed to billing.
Delete Unsigned Service Documents
Service documents can be set up to require users to have a Delete Unsigned Documents privilege level in order to delete unsigned service documents. (See the System Administrator Guide.) If a staff member does not have the appropriate privilege level, the Delete button will not be available.
If a service document is configured without delete restrictions, staff members who have access to the ECR can delete unsigned service documents. Once a service document is signed, it is locked and cannot be deleted.
1. Navigate to the ECR > Show Menu > Select the unsigned service document needing deletion.

2. Click the Delete button that corresponds with an unsigned service document. The Confirm Delete page appears.
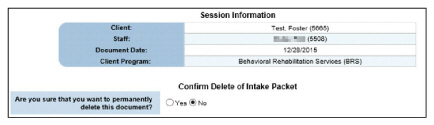
3. Select Yes to confirm deletion and click Submit. The service document has been removed from the system.
Once a document is signed, it is locked and cannot be modified. The number of staff signatures required on a service document is defined when the service documents are configured. (See the System Administrator Guide.)
In addition to the staff signature, a service document can also be configured for external signatures, like clients or guarantors. In order for a client to sign a service document, the signature pad hardware device must be installed.
1. Access a service document.
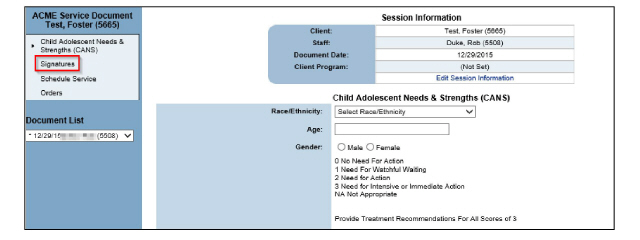
2. Click the Signatures link in the left pane. The Electronic Signatures page appears.
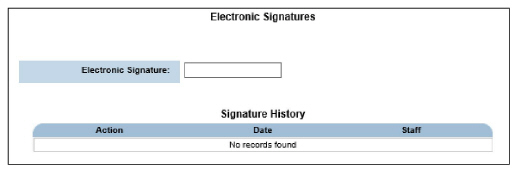
If a module within the service document has required fields and validation enabled, bypassing it will produce a validation error when selecting the signature page. All validation errors must be cleared before the Electronic Signatures page will display the Electronic Signature field. |
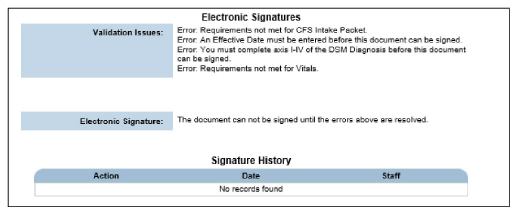
3. Fill out the needed information and click Submit in the status bar. The Signature Date column now displays the date the service document was signed.

Service Document Review History
Each created service document contains a signature history table, or Signature History, on the Signatures page.
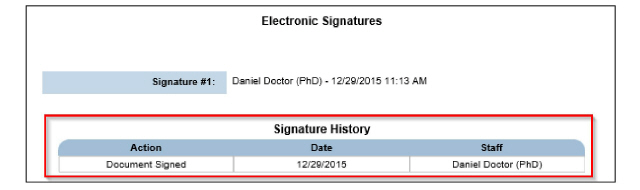
The table will be blank if no signatures have been recorded. This allows clinicians and supervisors to review a document’s progress through signatures. The Signature History on client service documents will only display to the creator of the document, any staff selected to sign next, and clinical supervisors. The view capability for supervisors will occur only if the document is signed on or after the date the employee is assigned to their supervision.
Once the document is fully signed, the Signature History is visible only for those with the Show Service Document Review History privilege level. Supervisory status will no longer be considered when determining who can view the Signature History.
Sign an Incomplete Service Document
There are some cases when service documents need to be marked Incomplete. If a service document type requires the flexibility of being signed incomplete, it will have to be configured during instancing. (See Add Instances to Service Documents in the System Administration Guide.)

An example where this would be needed is when a client has left the program prior to document completion but with services provided. This procedure allows a service document to be marked Incomplete but still be signed.
This option is not recommended for service documents that are used for State Reporting. |
1. Access a service document to be signed. When the Incomplete radio button is selected, the Incomplete Category and Reason fields appear.
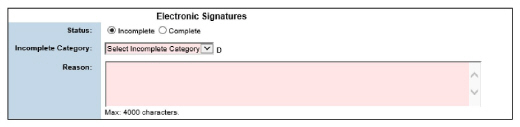
2. Fill out the required information and click Submit.
CareLogic offers a Client Signature module to record more detailed information about any external participants such as family members, probation officers, or others who were present for and may have participated in the client session.
1. Navigate to a service document that contains the Client Signature module and click the Client Signature link in the left pane. The Client Signature page appears.
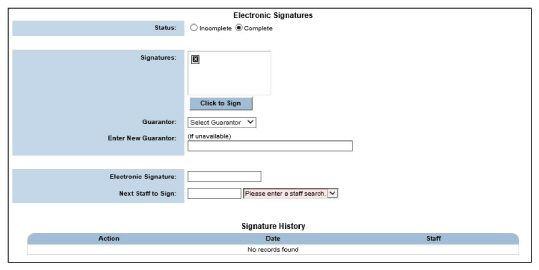
2. Fill out the needed information then click the Click to Sign button below the Client’s Signature field. A Signature Capture window opens.
3. Have the client or guarantor manually sign the signature pad. The external signature appears in the Signature Capture window.
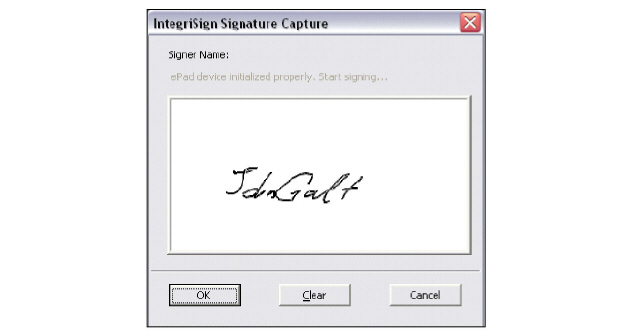
4. Click the OK button on the Signature Capture window. The external signature is captured and it is displayed on the Electronic Signatures page.
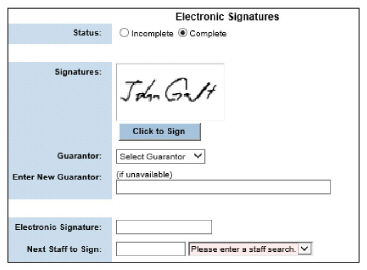
5. Fill out the rest of the required information and click Submit in the status bar. The internal and external signatures are captured.
Access Completed Service Documents from Within a New Service Document
CareLogic allows access to previously completed service documents from a new service document. The Document List appears in open service documents and is located below the Service Document Wizard. It displays the previous records of the service document for the selected client. The list displays the date of the document and the staff who completed the documentation. It can be used to compare results over time.
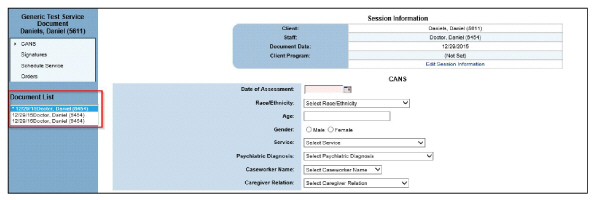
The Copy Forward feature enables clinicians to create new service documents while reviewing and using the client’s older service document information.
Service documents can only be copied forward if they are part of the same instance of a service document. |
• In order to copy forward service documents built using standard clinical modules, the Copy Service Document module must be selected when instancing the service document. (See Add Instances to Service Documents in the System Administrator Guide.)
• In order to copy forward service documents that use configurable forms, the fields in the configurable forms that are to be copied must be flagged for copy forward on the Field Code page when building the configurable form. (See Build Configurable Forms in the System Administrator Guide.)
The copy forward feature is not available for all service documents. It is available only on certain ones that are accessed through the ECR or the Schedule. |
1. Access a service document that has been set up to allow copy forward. By default, the Copy Service Document link is selected in the left pane. The Copy Service Documents page appears in the right pane for the selected service document, displaying all of the signed service documents that can be copied forward.
To review the contents of a service document, click the Report button. This helps ensure the correct version of the service document is copied. |

2. Click the Copy button of the service document desired. With the exception of the document signatures, all of the data in the service document is copied forward into the new instance of the service document. It can now be edited, signed, and submitted.
Copy Forward Configurable Form Fields
The Copy Forward Configurable Form Fields feature enables designated fields to be copied forward across service document types, reducing redundant data entries in the Initial Assessment, Discharge Summary, POMS, and Plan of Care modules.
This is not a general capability. Only those fields and service documents discussed in this section have the capability. |
Copy Forward-Presenting Concerns
The Copy Forward-Presenting Concerns feature is used to copy the Presenting Problem field in Intake Tracking (POE > Show Menu > Intake Tracking) to the Presenting Concerns field in the Copy Forward: IA – History and Discharge Summary module.
The Copy Forward: IA-History and Discharge Summary is configured in a Service Document, which is then included as part of the POE Wizard. When Intake Tracking records are converted into POE records, whatever is recorded in the Presenting Problem field in Intake Tracking will appear in the Presenting Concerns field of the Copy Forward: IA – History and Discharge Summary module.


Copy Forward-Priority Group and Summary
The Copy Forward-Priority Group and Summary is used to pre-populate the POMS Record and the Tx Plan Info modules. The priority group information will copy forward to the POMS Record. The summary will copy forward to the Tx Plan Info module.
Add a Copy Forward-Priority Group and Summary Record
1. Access the ECR and pick a service document containing Copy Forward-Priority Group and Summary.
2. Select and fill out the Copy Forward: Priority Group and Summary module.
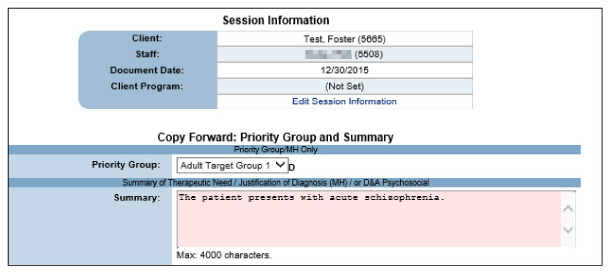
3. Fill out the needed information and click Submit.
• The Information entered in the Priority Group field will populate the Priority Group/MH Only field in the POMS Record.
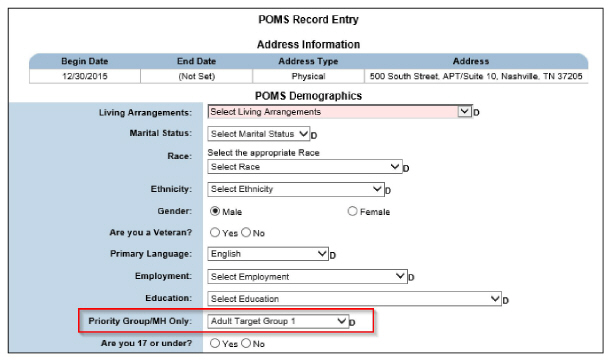
• The information entered in the Summary field of the Copy Forward: Priority Group and Summary module is copied into the Presenting Problem field in the Tx Plan Info module.
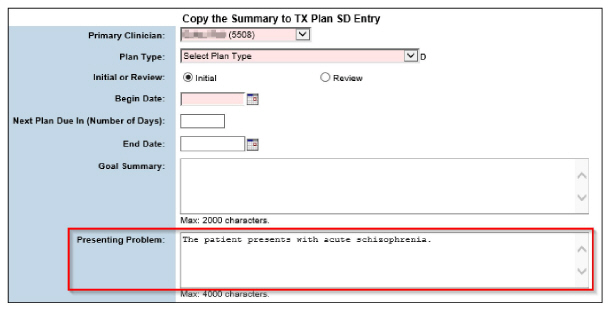
The Copy Forward-Plan of Care is used to pre-populate Tx Plan Info modules.
1. Access the ECR and pick a service document containing Copy Forward-Plan of Care.
2. Select and fill out the Copy Forward-Plan of Care module.

3. Fill out the needed information and click Submit. The information entered in the Client Strengths/Abilities/Supports field is copied forward into the Goal Summary field in the Tx Plan Info module.
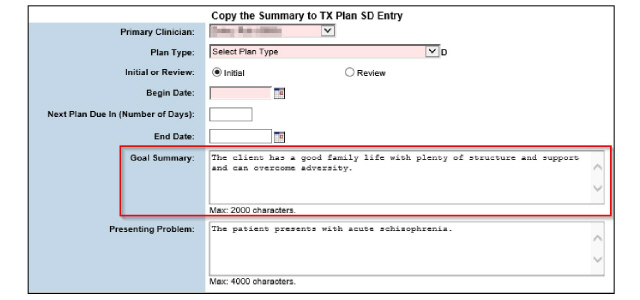
Copy Forward-POMS Record and Plan of Care
The Copy Forward-POMS Record and Plan of Care module is used to pre-populate the POMS Record and the Plan of Care modules. The demographic and school information will copy forward to the POMS Record. The school information will copy forward to the Plan of Care.
Add a Copy Forward-POMS Record
1. Access the ECR and navigate to a service document containing Copy Forward-POMS Record and Plan of Care.
2. Select and fill out the Copy Forward: POMS Record and Plan of Care module.
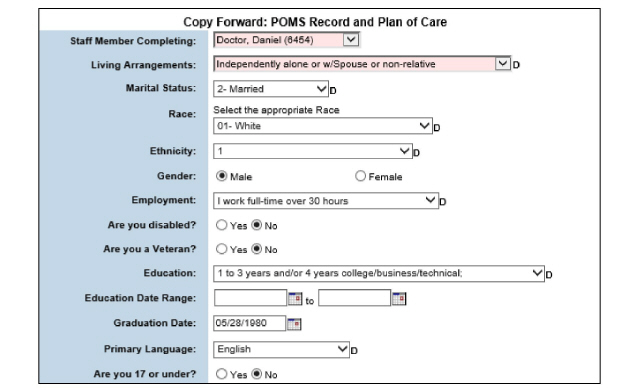
3. Complete the form and click Submit. The Living Arrangements, Marital Status, Race, Ethnicity, Gender, Are you a Veteran?, Primary Language, Employment, and Education fields are copied forward from to the POMS Record module.
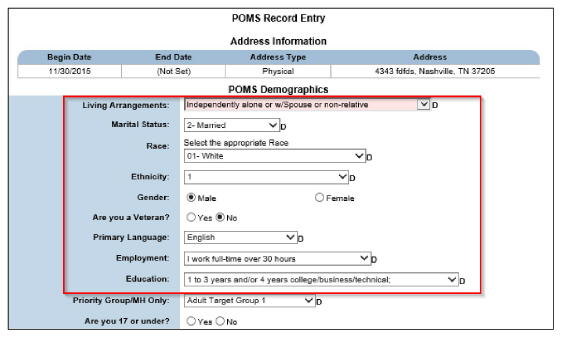
Add an Addendum to Service Documents
Once a service document is signed, it is locked and cannot be modified. An addendum can be made to a signed service document that needs to be updated. Service documents can have multiple addenda added to them. The Addenda button displays the number of addenda associated with each service document.
When a service document is printed, the report includes addenda information by default. |
1. Access a service document page.

2. Click the Addenda button for the version of the service document needed. The Addenda page appears for the selected service document.

3. Click Add Addendum in the status bar. The Addenda page changes to data entry mode.
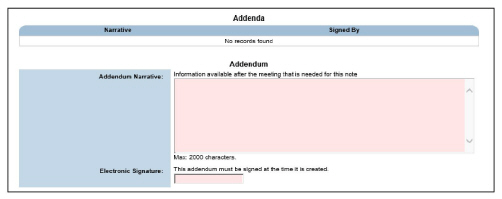
4. Fill out the needed information and click Submit. The addendum record is saved and listed on the Addenda page.

Addendum information that is added to a service document is automatically included in the printed report. (See Print Service Documents.) |
System Administrators have the ability to audit an individual service document to view the entire audit history of which staff members have viewed, created, modified, deleted, and printed that document.
Only users with the Administrator privilege level have access to the Audit button. |
1. Access a service document page and click the Audit button for the version of the service document needed. The Audit Log page appears, displaying all staff members who accessed the selected service document.


2. The Audit Log page can be exported as a spreadsheet by clicking the Export to Excel button in the status bar.
Accept or Reject a Signed Service Document
Once a service document that requires multiple signatures is signed, it is locked and cannot be modified by anyone, including the supervisor of the staff member who signed it. Supervisors can be granted the ability to review and accept or reject signed service documents.

This feature can be enabled when adding instances to service documents. (See Add Instances to Service Documents in the System Administration Guide.)
1. Access a service document that has been configured to allow signed documents to be either accepted or rejected by the next staff to sign.
2. Click the Signatures link in the left pane. Additional signing staff are asked if they accept the document.

3. If Yes is selected and the document is signed, the service document acts normally. If No is selected, a Reason for rejecting this document field appears.
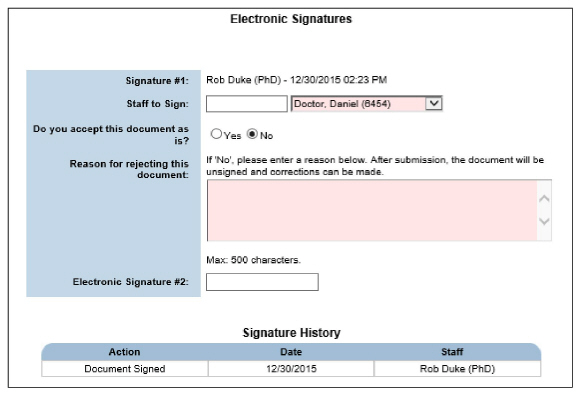
4. Fill out the information and click Submit in the status bar. The document is now unsigned. When the Signatures module is accessed again, the Review History is displayed with the reject reason.
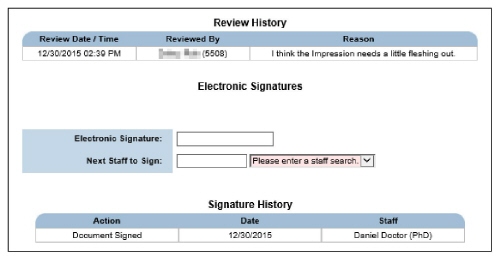
1. Access a service document.

2. Click the Report button. A new web browser tab opens, displaying a report of the selected service document in the PDF format.
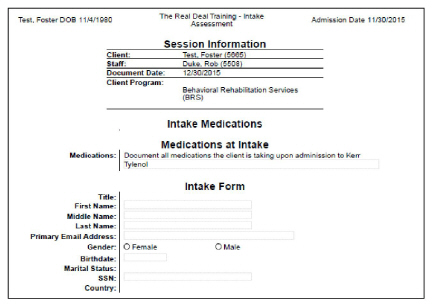
3. Print the PDF.
Delete Signed Service Documents
Deleting Signed Service Documents is a privilege that can only be completed by a System Administrator. |
1. Access the desired service document page.

2. Click the Delete button that corresponds with the desired signed service document. The Confirm Delete page appears.
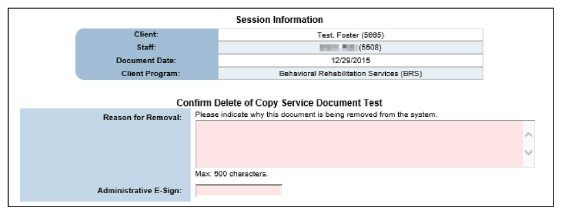
3. Fill out the needed information and click Submit in the status bar. The Web browser is refreshed and returned to the service document page. A confirmation message appears in the button bar, which indicates the selected service document has been deleted from the system.

Complete Service Document Groups
CareLogic offers the ability to create service document groups for capturing multiple sets of information in one module. The service document group module creates tabbed containers that house each service document associated with the group and allows each service document to be signed by the appropriate staff.
If a Service Document Group deletion is attempted, a warning appears to alert that all service documents associated with the service document group will be deleted.
1. Access the service document page for a service document that has been configured as a service document group.

2. Click Add a Service Document in the status bar. The Add a Service Document tabbed container page appears.

3. If the service document group has been set up to require a final signature, use the drop-down list to select the desired staff member and click Submit in the status bar. The service documents available in the service document group appear. The Electronic Signatures page appears, displaying the requirements to complete the service document group.
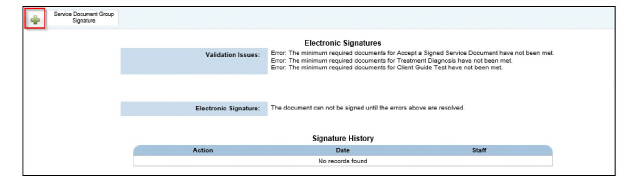
4. Click the + in the upper left-hand corner. The page that allows the choice of service documents in the group appears.

Service documents available to be created are determined by the service document set up. (See the System Administrator Guide for more information about setting up service document groups and adding instances to them.) |
5. Select the service document desired and click Create Service Document. The selected service document page appears.
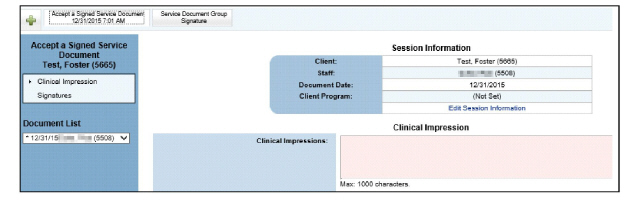
6. Complete the service document normally by clicking the appropriate module in the left pane and completing each form in the service document.
Delete a Service Document Group
Deleting a service document group will also delete the service documents contained in the group. |
1. Access the desired service group and click Delete. The Confirm Delete of page appears.
The Delete button can be privileged to display only if the user has the correct privilege level. |
2. Fill out the needed information and click Submit.