Employee Management
The CareLogic employee management system allows tracking of address information, contact information, employment information, employee credentials, employee benefits, staff programs, and staff assets for employees in CareLogic.
This section includes the following topics:
• Resetting Account Passwords and Signatures
• Setting Up Additional Staff Information
The process of adding a new staff member involves performing a staff search and completing several new staff modules.
The staff search is required to prevent duplicate staff records from being entered into the system. The modules create a basic record for the staff member. The following process is used to enter demographic information, employment records, user privileges, and login accounts:
• Accessing the Employee Record
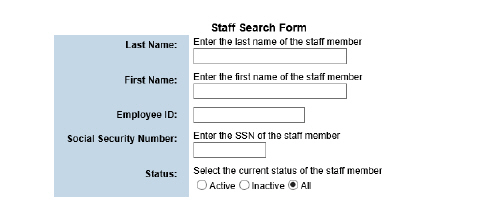
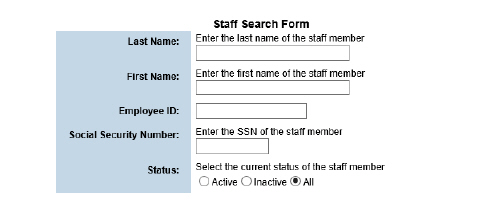
A staff search is needed to confirm the employee does not already exist in the system. After confirming the staff member does not exist, a record for the employee can be created. Staff members need to have an active employee record in order to log into to CareLogic.
1. Navigate to Employee.
2. Fill out the needed information and click Submit. The system searches for possible matches.
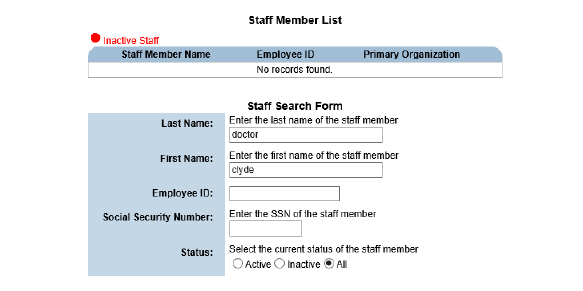
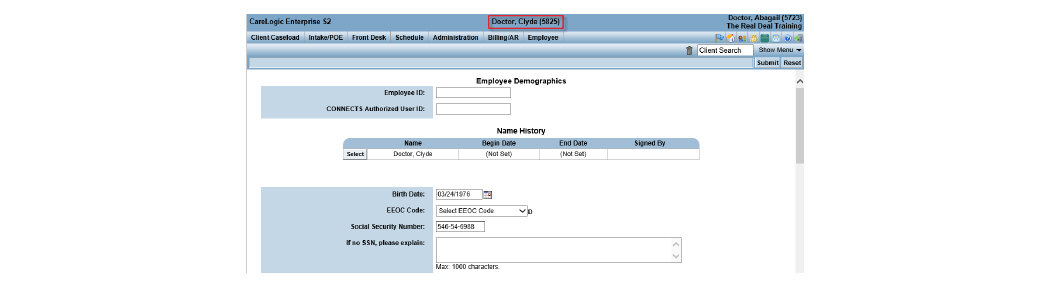
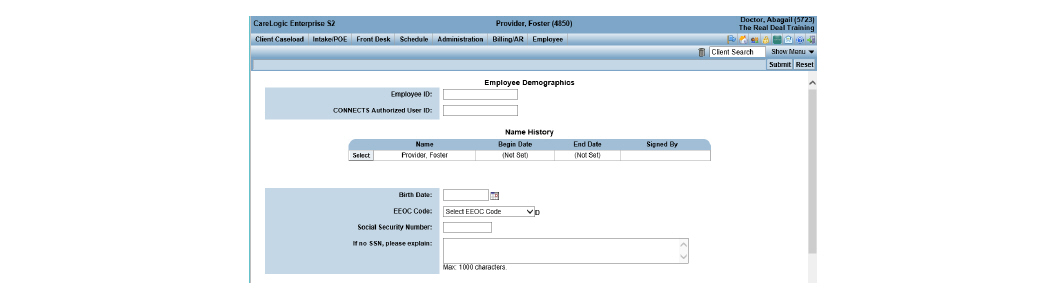
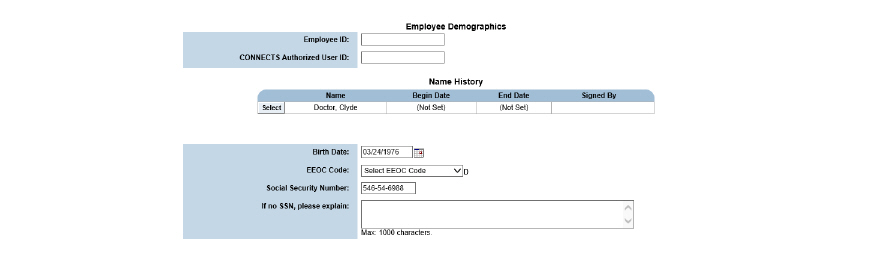
3. Click Add New Staff. The Employee Demographics page appears.
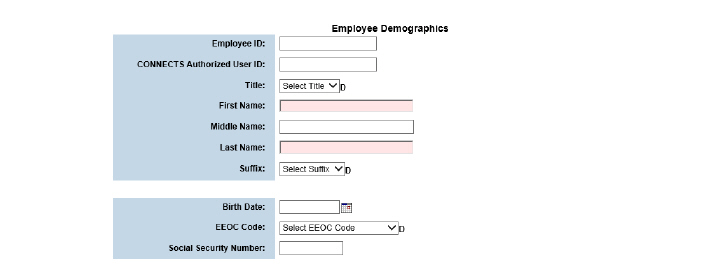
4. Fill out the needed information and click Submit. The employee’s record is now in the system.
1. Navigate to Employee > Search for the employee and click Submit.
2. Press the Select button for the desired employee. The employee record is displayed. Note the employee name at the top of the page. When an employee is selected in this manner, additional options will appear for the individual under Show Menu.
Staff members need to have an active employee record in order to log into to CareLogic.
1. Navigate to Employee > Search for the employee and click Submit > Press the Select button for the correct employee > Show Menu > Employment History.

2. Click the Add Employment Entry button.
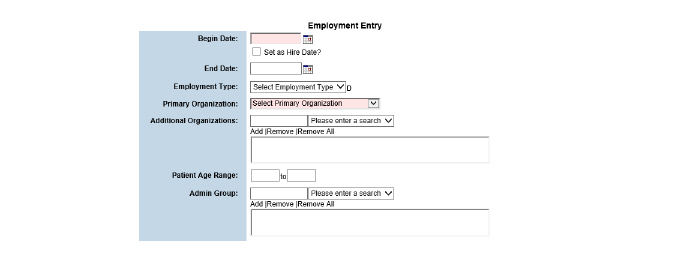
3. Fill out the needed information and click Submit in the status bar.

1. Navigate to Employee > Search for the employee and click Submit > Press the Select button for the correct employee > Show Menu > Login Information.
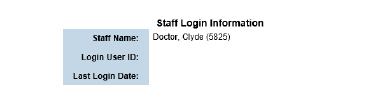
2. Click the Create Login User ID button.

3. Enter the user ID and click Submit.
|
Keeping naming conventions consistent across the organization can make it easier for users to remember their IDs. |
Privilege levels are used to grant access to different CareLogic modules depending on the job role of the employee. CareLogic contains several default privilege levels that can be assigned to staff members. If the default privilege levels do not meet the needs of the organization, custom privilege levels can be created. (See the System Administration Guide.)
1. Navigate to Employee > Search for the employee and click Submit > Press the Select button for the correct employee > Show Menu > Privileges.

2. Select the appropriate privilege levels and click Submit in the status bar. The privilege levels are saved and applied to the selected user’s account.
Staff members who have not been assigned a supervisor or a supervisory group or who have alerts about a leave of absence, driver training, or credential expirations can cause an HR Alert to be generated. Any user who has access to the Employee tab can view HR Alerts.
1. Navigate to Employee > Show Menu > HR Alerts.
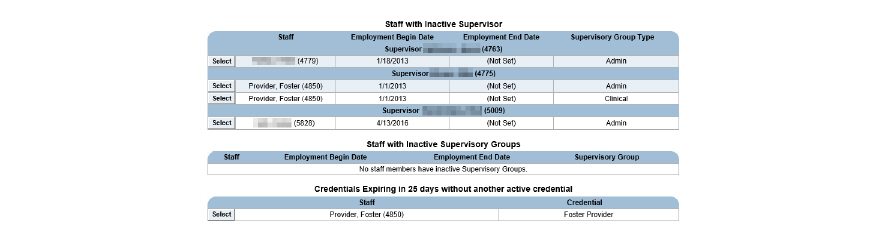
2. Click the Select button for the staff member needing an alert addressed. The selected staff member’s record is opened.
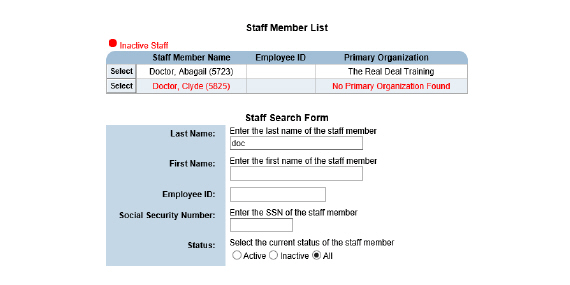
The Staff Search module is used to search for staff members across all organizations.
|
Although the staff search results lists all of the staff records that match the search criteria, only the staff records that are in the current organization or a child organization can be accessed. If a staff record is above the current organization, or in a different organizational branch, it will not appear with a Select button and cannot be accessed. |
1. Navigate to Employee.
2. Fill out the needed information and click Submit in the status bar.
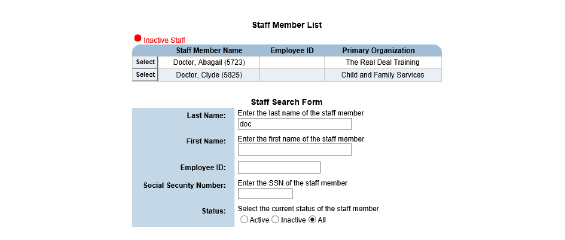
3. Click the Select button for the desired staff member.
Resetting Account Passwords and Signatures
If staff members lose or forget their passwords, they can be reset by an administrator.
1. Navigate to Employee > Search for the employee and click Submit > Press the Select button for the correct employee > Show Menu > Reset Password.

2. Select Yes and click Submit. The password is reset to password. The user will change it and choose an electronic signature on the next login.
Changing Passwords when the Password is Known
|
Only the user can change their password in the following manner. |
1. Click the Lock Icon button in the menu bar.

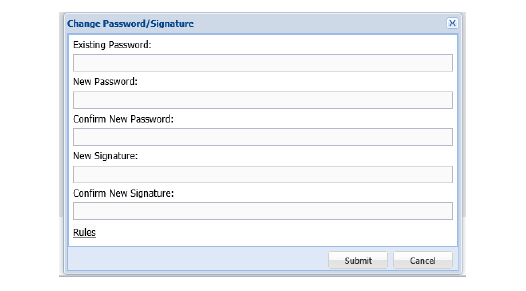
2. Fill out the needed information and click Submit. The password and electronic signature are reset for the selected staff member.
Setting Up Additional Staff Information
When staff members are granted access to the Employee menu, they have access to all of the modules within the Employee menu. If an organization wants to limit the access for certain staff members, the Staff Additional Setup module is used. This module is completely configurable, which means the organization controls which Employee modules are available to which staff members.
|
The Staff Additional Setup module is configured by Qualifacts. If the organization wants to use this module, contact Qualifacts for assistance. |
This section includes the following topics:
• Maintaining Address and Contact Information
• Maintaining Emergency Contact Information
• Maintaining Employee Dependents
• Maintaining Leave of Absence Events
• Maintaining Client Relationships
• Using the Document Library for Employees
Even though a staff member’s demographic information is entered before they can use the system (see Adding New Staff Members), it can be updated anytime. This task is used to update a staff member’s demographic information.
1. Navigate to Employee > Search for the employee and click Submit > Press the Select button for the correct employee.
|
The Employee Demographics page can also be accessed by clicking Show Menu > General Information while in the Employee tab. |
2. Change the needed information and click Submit. The employee’s demographic information is saved.
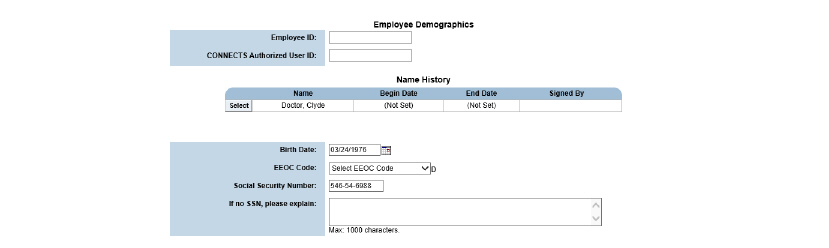
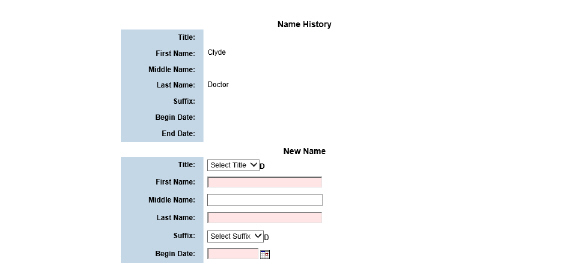
Updating Employee Name History
Employee names are entered into the system when the employee record is first created. When an employee’s name changes, it is possible to update their name in the system. CareLogic keeps a record of any name changes for employees.
1. Navigate to Employee > Search for the employee and click Submit > Press the Select button for the correct employee.

2. Click the Select button for the most recent employee name.
|
Clicking Select for inactive employee names will generate a read-only text display of the employee name history. |
3. Change name information and click Submit in the status bar. The employee name change is saved to the system and displayed on the Employee Demographics page under Name History.

Maintaining Address and Contact Information
The Address Information module is used to set up and maintain staff members’ physical, mailing, and work addresses as well as their contact information. A staff member can have only one active address at a time. If a new address for an employee is needed, the current address should be end dated, then a new address record added.
1. Navigate to Employee > Search for the employee and click Submit > Press the Select button for the correct employee > Show Menu > Address Information.

This page is used for:
1. Navigate to Employee > Search for the employee and click Submit > Press the Select button for the correct employee > Show Menu > Address Information.

2. Click Add Address.

3. Pick a type from the dropdown.
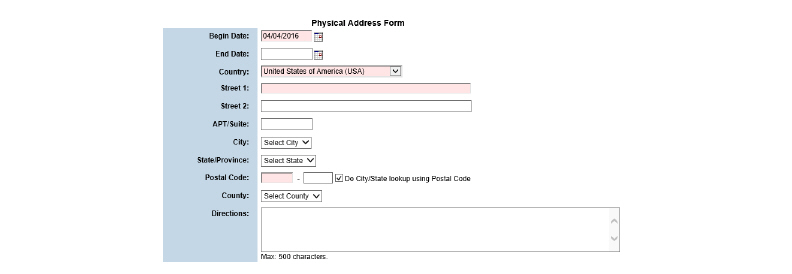
4. Fill out the needed information and click Submit in the status bar. The address information is saved and listed on the staff address page.

1. Navigate to Employee > Search for the employee and click Submit > Press the Select button for the correct employee > Show Menu > Address Information.

2. Click Update Contact Information.
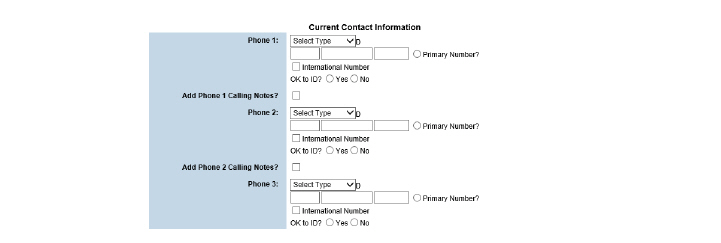
3. Enter any telephone numbers or email addresses desired and click Submit.
Maintaining Emergency Contact Information
The Emergency Contact module is used to maintain a list of emergency contacts for the selected staff member.
1. Navigate to Employee > Search for the employee and click Submit > Press the Select button for the correct employee > Show Menu > Emergency Contacts.

This page is used to perform the following tasks:
Each employee is allowed an unlimited number of emergency contacts. For each emergency contact, address, telephone number, and relationship to employee can be tracked.
1. Navigate to Employee > Search for the employee and click Submit > Press the Select button for the correct employee > Show Menu > Emergency Contacts.

2. Click the Add Contact button.

3. Fill out the needed information and click Submit. The emergency contact record is saved and listed on the Emergency Contact Information page.
1. Navigate to Employee > Search for the employee and click Submit > Press the Select button for the correct employee > Show Menu > Emergency Contacts.

2. Click the Select button that corresponds with the emergency contact record needing edits.

3. Make the desired edits and click Submit. The updated emergency contact record is saved and listed on the Emergency Contact Information page.
Maintaining Employee Dependents
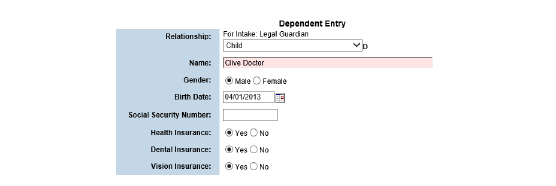
The Dependents module allows a record for each employee’s dependents. It allows new records to be added and existing records to be edited and deleted.
1. Navigate to Employee > Search for the employee and click Submit > Press the Select button for the correct employee > Show Menu > Dependents.

This page is used to perform the following tasks:
1. Navigate to Employee > Search for the employee and click Submit > Press the Select button for the correct employee > Show Menu > Dependents.

2. Click the Add Dependent button.
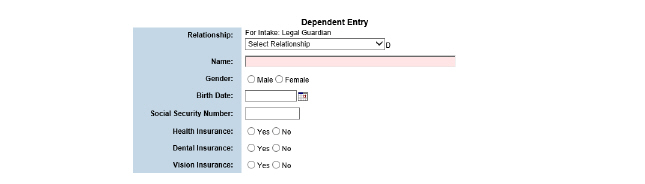
3. Fill out the needed information and click Submit in the status bar. The dependent record is saved and listed on the Employee Dependents page.
1. Navigate to Employee > Search for the employee and click Submit > Press the Select button for the correct employee > Show Menu > Dependents.

2. Click the Select button of the dependent record needing edits.
3. After making the desired edits, click Submit. The updated dependent record is saved and listed on the Employee Dependents page.
1. Navigate to Employee > Search for the employee and click Submit > Press the Select button for the correct employee > Show Menu > Dependents.

2. Click the Delete button for the dependent record needing deletion.

3. Click Yes and click Submit in the status bar. The selected dependent record is deleted from the system.
Maintaining Leave of Absence Events
The Leave of Absence module is used to maintain a record for each leave of absence an employee takes.
1. Navigate to Employee > Search for the employee and click Submit > Press the Select button for the correct employee > Show Menu > Leave of Absence.

This page is used to perform the following tasks:
• Adding Leave of Absence Events
• Editing Leave of Absence Events
• Deleting Leave of Absence Events
Adding Leave of Absence Events
For each leave of absence, the start date, return date, number of hours used, and any comments regarding the leave of absence can be tracked in CareLogic.
1. Navigate to Employee > Search for the employee and click Submit > Press the Select button for the correct employee > Show Menu > Leave of Absence.

2. Click the Add Leave of Absence button.
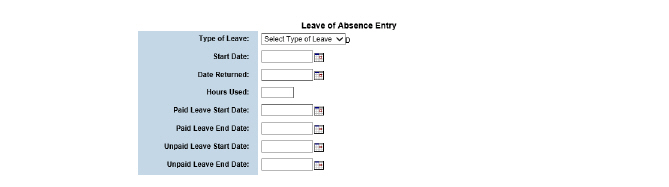
3. Fill out the needed information and click Submit in the status bar. The leave of absence record is saved and listed on the Leave of Absence Events page.
Editing Leave of Absence Events
1. Navigate to Employee > Search for the employee and click Submit > Press the Select button for the correct employee > Show Menu > Leave of Absence.

2. Click the Select button for the desired leave of absence record.

3. After making the desired edits, click Submit in the status bar. The updated leave of absence record is saved and listed on the Leave of Absence Events page.
Deleting Leave of Absence Events
1. Navigate to Employee > Search for the employee and click Submit > Press the Select button for the correct employee > Show Menu > Leave of Absence.

2. Click the Delete button for the desired leave of absence record.

3. Select Yes to confirm deletion of the selected leave of absence record. Click Submit in the status bar. The selected leave of absence record is deleted from the system.
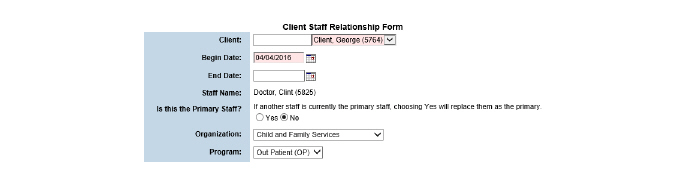
Maintaining Client Relationships
The Client Relationship module is used to manage the caseloads of staff members. Although a client can have many staff relationships, there can be only one primary staff relationship for each client for a given date range.
1. Navigate to Employee > Search for the employee and click Submit > Press the Select button for the correct employee > Show Menu > Client Relationships.

This page is used to perform the following tasks:
• Adding a Client Relationship
• Updating a Client Relationship
• Deleting a Client Relationship
1. Navigate to Employee > Search for the employee and click Submit > Press the Select button for the correct employee > Show Menu > Client Relationships.

2. Click Add New Relationship.
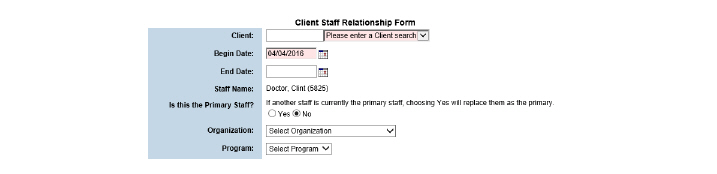
3. Fill out the needed information and click Submit. The client staff relationship record is saved and listed on the Client Staff Relationships page, and the client is added to the staff member’s caseload.
Updating a Client Relationship
Once a client relationship is established, it remains valid for the duration of the date range. However, client relationships can be modified.
1. Navigate to Employee > Search for the employee and click Submit > Press the Select button for the correct employee > Show Menu > Client Relationships.

2. Click the client relationship entry needing an update.
3. Make the desired edits, and click Submit in the status bar. The client relationship record is updated and listed on the Client Staff Relationships page.
Deleting a Client Relationship
|
When a client relationship is deleted, the client is automatically removed from the staff member’s caseload. |
1. Navigate to Employee > Search for the employee and click Submit > Press the Select button for the correct employee > Show Menu > Client Relationships.

2. Click the desired Delete button. A confirmation popup appears. Click OK to confirm. The client relationship record is deleted and the client is removed from the staff member’s caseload.
Using the Document Library for Employees
The Document Library module allows users to search and view service documents that are attached to employee records. This module allows the search of entire organizations or specific employee records. The following file formats can be uploaded using the Document Library module: CSV, DOC, DOCX, JPG, PDF, RTF, TIF, TXT, XLS, and XLSX documents.
1. Navigate to Employee > Search for the employee and click Submit > Press the Select button for the correct employee > Show Menu > Document Library.

|
Selecting a specific employee record limits search results in the Document Library to the selected employee. For organization-wide searches, do not access a specific employee record. For these searches, click Employee > Show Menu > Document Library. |
2. Fill out the search criteria and click Submit in the status bar. The Document Library page refreshes, displaying the search results.
Adding Scanned Documents to Employee Records
1. Navigate to Employee > Search for the employee and click Submit > Press the Select button for the correct employee > Show Menu > Document Library.

2. Click Add a Document.

3. Fill out the needed information. Click Browse and find the document needing to be uploaded. Click Submit. The uploaded document is saved to the system and appears in the Document Search results.
Deleting Scanned Documents from Employee Records
1. Navigate to Employee > Search for the employee and click Submit > Press the Select button for the correct employee > Show Menu > Document Library.

2. Click the Delete button for the desired document. A delete confirmation dialog window appears. Click OK to confirm. The Document Library search results list page refreshes, deleting the selected scanned document from the system.
Maintaining Employment Information
This section includes the following topics:
• Maintaining Employee Information
• Completing the Hire Checklist
• Maintaining Employee Benefits
• Tracking Workers’ Compensation
• Maintaining Employee Training
• Maintaining Performance Reviews
• Setting Up Performance Targets
• Maintaining Employee Driver Information
• Maintaining Supervisor Groups
Maintaining Employee Information
Normally employment records are created at the beginning of the process. (See Creating an Employee Record.) Once it is created, employee information can be maintained.
1. Navigate to Employee > Search for the employee and click Submit > Press the Select button for the correct employee > Show Menu > Employment History.

This page is used to perform the following tasks:
• Setting Up Pay for Performance Records
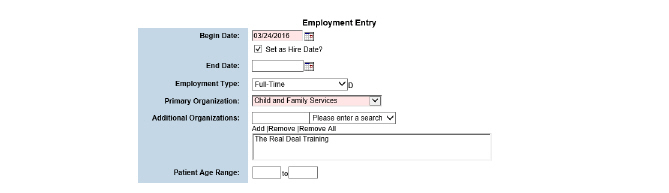
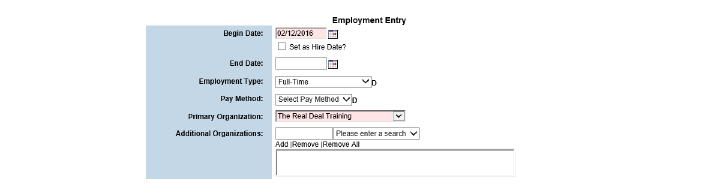
Employment records are specific to job functions. When a staff member accepts a new job function, a new employment record should be created.
1. Navigate to Employee > Search for the employee and click Submit > Press the Select button for the correct employee > Show Menu > Employment History.

2. Click the Add Employment Entry button.

3. Fill out the needed information and click Submit. The record of employment history is saved and listed on the Current Employment page.
1. Navigate to Employee > Search for the employee and click Submit > Press the Select button for the correct employee > Show Menu > Employment History.

2. Click the entry for the employment record needing edits.
3. Make the desired edits and click Submit in the status bar. The updated employment record is saved and listed on the Current Employment page.
1. Navigate to Employee > Search for the employee and click Submit > Press the Select button for the correct employee > Show Menu > Employment History.

2. Click the Delete button for the employment record needing deletion. A confirmation popup appears. Select OK to confirm deletion. The selected employment record is deleted from the system.
Setting Up Pay for Performance Records
The Pay for Performance feature calculates staff pay based on completed services. (See the System Administration Guide for more information about Pay for Performance.)
The Employment History page contains percentage rate fields that allow an administrator to adjust the performance rate percentage for a staff member for each grid created.
1. Navigate to Employee > Search for the employee and click Submit > Press the Select button for the correct employee > Show Menu > Employment History.

2. Add a new employment entry, or click an existing one.
3. Scroll to the bottom of the page and enter a value for the Performance Rate Grid Entry. If there is more than one, enter values for all appropriate grids. Click Submit. This allows providers to monitor their documented billable services. A report is available in Utilization Management Reports in the Client menu.

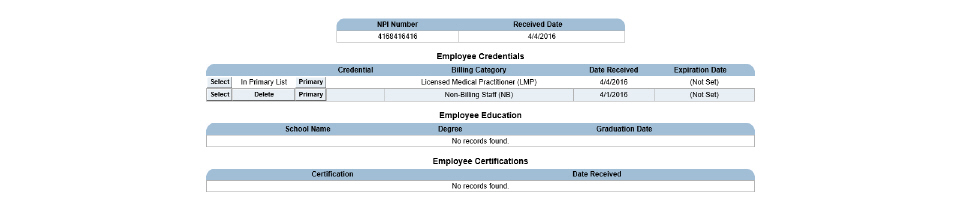
The Credentials module is used to record staff NPI numbers and to maintain staff credentials, educational records, and certification records.
1. Navigate to Employee > Search for the employee and click Submit > Press the Select button for the correct employee > Show Menu > Credentials.

This page is used to perform the following tasks:
The National Provider Identifier (NPI) number appears on claims. A unique NPI number should be assigned to each staff member and treatment facility.
1. Navigate to Employee > Search for the employee and click Submit > Press the Select button for the correct employee > Show Menu > Credentials.

2. Click Add NPI Number.
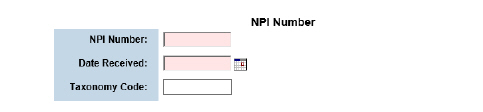
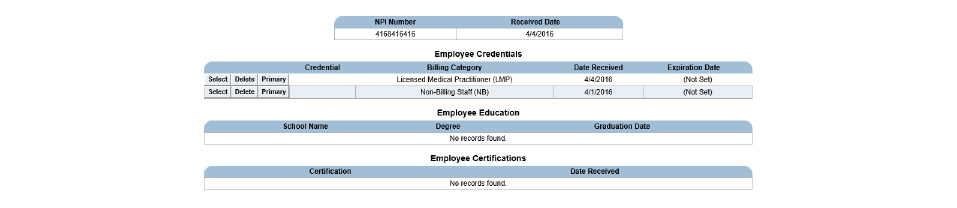
3. Fill out the needed information and click Submit. The record is saved and the NPI number is displayed on the Employee Credentials page.
When a staff member earns a credential, a record of it should be entered in the system. In order to bill for services, the staff member must have a primary credential set up. Fee matrices, which are set up for payer plans, use primary credentials when calculating fees for services. If a staff member does not have a primary credential set up, the service cannot be converted into a claim and the billing system moves the activities into Failed Activities. (See the Billing and Accounts Receivable Guide.) A staff member can have an unlimited number of non-primary credentials. However, the billing system does not use non-primary credentials.
1. Navigate to Employee > Search for the employee and click Submit > Press the Select button for the correct employee > Show Menu > Credentials.

2. Click the Add Credential button.
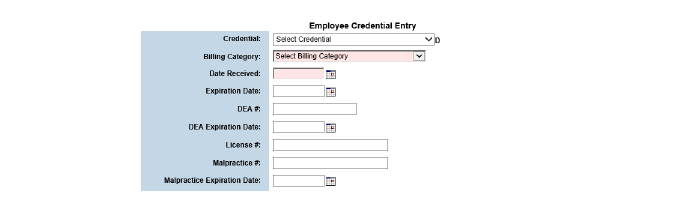
3. Fill out the needed information and click Submit. The credential record is saved and listed on the Employee Credentials page.
There are two different types of credentials: primary and non-primary. The Claim Engine only uses the primary credential to bill for services. Although a staff member can have many non-primary credentials, only one active primary credential can be defined for a given date range. By default, when a credential is added, it will be non-primary.
1. Navigate to Employee > Search for the employee and click Submit > Press the Select button for the correct employee > Show Menu > Credentials.
2. Click the Primary button for the billing category it is desired to make the primary credential.

3. Click the Add Primary Range button in the status bar.
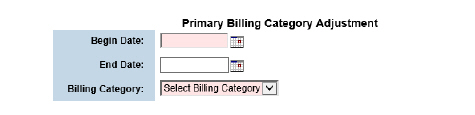
4. Fill out the needed information and click Submit in the status bar. The selected credential is marked as primary and will be active during the defined date range.
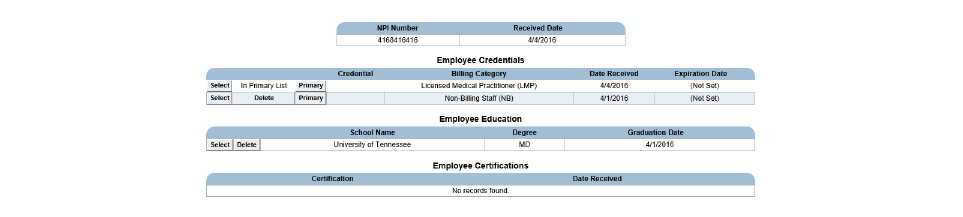
1. Navigate to Employee > Search for the employee and click Submit > Press the Select button for the correct employee > Show Menu > Credentials.
2. Click the Add Education History button in the status bar.
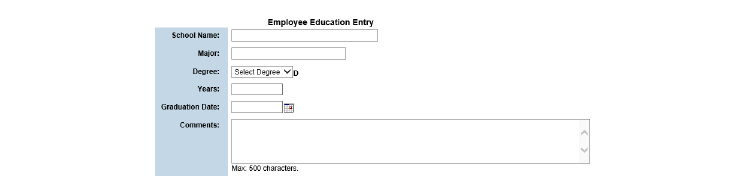
3. Fill out the information needed and click Submit. The education record is saved and listed on the Employee Credentials page.
1. Navigate to Employee > Search for the employee and click Submit > Press the Select button for the correct employee > Show Menu > Credentials.
2. Click the Add Employee Certification button.

3. Fill out the needed information and click Submit in the status bar. The certification record is saved and listed on the Employee Credentials page.
The Hire Checklist module contains a list of forms that should be completed for new employees. As each form is completed, the date received can be recorded on the Hire Checklist.
1. Navigate to Employee > Search for the employee and click Submit > Press the Select button for the correct employee > Show Menu > Hire Checklist.
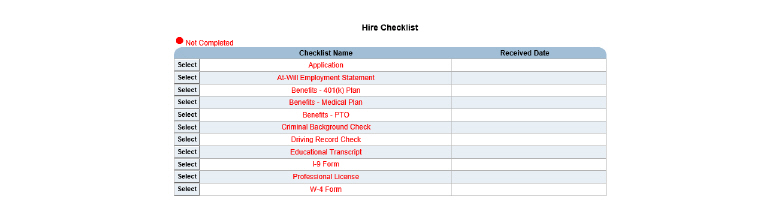
2. As forms are completed, click the Select button to record the date.
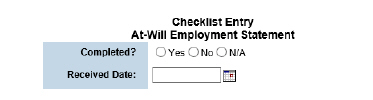
3. Fill out the needed information and click Submit. The record is saved and the received date is listed on the Hire Checklist page.
|
If the forms on the checklist are completed at the same time, the Update All Records button can be pressed to set the received date for all of the forms on the checklist. |
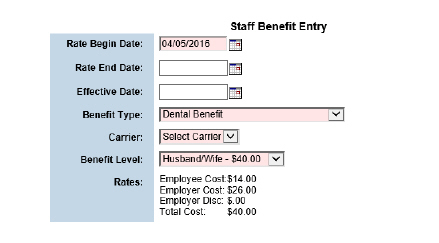
The Benefits module is used to track the benefits that are available to an employee. Medical, dental, vision, 401k, and any other optional benefit information can be tracked for each employee. As benefits change, old policy records should be end dated and new policy records can be added.
1. Navigate to Employee > Search for the employee and click Submit > Press the Select button for the correct employee > Show Menu > Benefits.

This page is used to perform the following tasks:
• Assigning Employee Benefit Records
• Editing Employee Benefit Records
• Deleting Employee Benefit Records
Assigning Employee Benefit Records
1. Navigate to Employee > Search for the employee and click Submit > Press the Select button for the correct employee > Show Menu > Benefits.

2. Click the Add Benefit button.
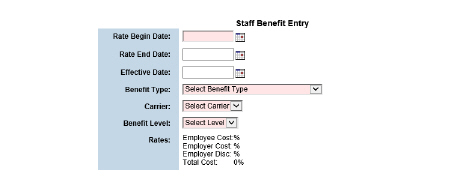
3. Fill out the needed information and click Submit. The benefits record is saved and listed on the Employee Benefits page.
Editing Employee Benefit Records
1. Navigate to Employee > Search for the employee and click Submit > Press the Select button for the correct employee > Show Menu > Benefits.

2. Click Select for the desired benefit type.
3. Change the desired information and click Submit in the status bar. The selected benefit record is updated in the system.
Deleting Employee Benefit Records
1. Navigate to Employee > Search for the employee and click Submit > Press the Select button for the correct employee > Show Menu > Benefits.

2. Click the Delete button for the benefit record needing deletion.

3. Check the Yes radio button and click Submit. The benefit record is deleted.
Tracking Workers’ Compensation
The Workmans Comp module is used to document, track, and report on workers’ compensation cases.
• Adding Workers’ Compensation Records
• Editing Workers’ Compensation Records
• Deleting Workmans’ Compensation Records
Adding Workers’ Compensation Records
1. Navigate to Employee > Search for the employee and click Submit > Press the Select button for the correct employee > Show Menu > Workmans Comp.

2. Click Add Case.
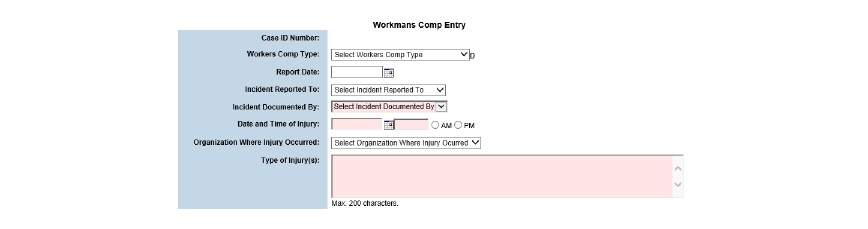
3. Fill out the needed information and click Submit in the status bar. The workers’ compensation record is saved and listed on the Workmans Comp Entry page.
Editing Workers’ Compensation Records
1. Navigate to Employee > Search for the employee and click Submit > Press the Select button for the correct employee > Show Menu > Workmans Comp.

2. Click the Select button for the desired Workers’ Compensation record.

3. Fill out the needed information and click Submit in the status bar. The workers’ compensation record is saved and listed on the Workmans Comp Entry page.
Deleting Workmans’ Compensation Records
1. Navigate to Employee > Search for the employee and click Submit > Press the Select button for the correct employee > Show Menu > Workmans Comp.

2. Click the Delete button for the desired Workers’ Compensation record.

3. Click Yes and then Submit. The Workers’ Compensation record is deleted from the system.
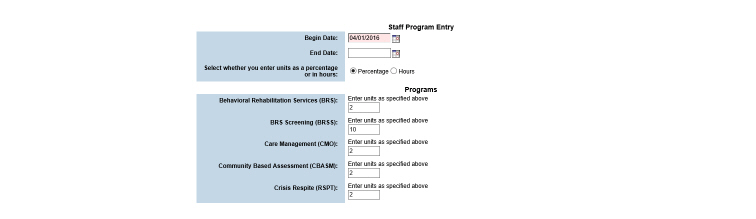
The Programs module is used to assign staff members to specific treatment programs. The percentage of time or the number of hours the staff member will devote to each program can be designated.
1. Navigate to Employee > Search for the employee and click Submit > Press the Select button for the correct employee > Show Menu > Programs.

This page is used to perform the following tasks:
1. Navigate to Employee > Search for the employee and click Submit > Press the Select button for the correct employee > Show Menu > Programs.

2. Click the Add Staff Program button.
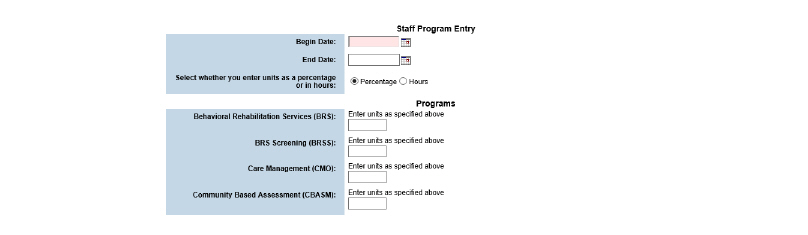
3. Fill out the needed information and click Submit in the status bar. The staff programs record is saved and listed on the Staff Programs page.
|
The program with the highest percentage or hours assigned will be designated as the staff’s primary program. If the highest level is shared, no primary program will be designated. For instance if two programs are marked as 40% and one as 20%, no primary program is designated because two programs share the highest percentage, 40%. |
1. Navigate to Employee > Search for the employee and click Submit > Press the Select button for the correct employee > Show Menu > Programs.

2. Click the Select button for the program record needing edits.
3. After making the desired edits, click Submit in the status bar. The updated program record is saved and listed on the Staff Programs page.
1. Navigate to Employee > Search for the employee and click Submit > Press the Select button for the correct employee > Show Menu > Programs.

2. Click the Delete button for the Staff Program needing deletion.

3. Click the Yes radio button then click Submit. The selected program record is deleted from the system.
The Staff Shifts/Organizations allows the creation and modification of a staff member’s availability for shifts. Once organizations are recorded, appointments can be scheduled for the staff member. The shift information is used by the CareLogic scheduling feature to warn a user if they are scheduling an appointment where the staff is not available.
|
CareLogic allows users to override the staff member’s availability when scheduling an appointment. If a time is selected outside a staff member’s availability, the system warns that the activity is outside the staff member’s availability but allows it to be scheduled anyway. |
1. Navigate to Employee > Search for the employee and click Submit > Press the Select button for the correct employee > Show Menu > Staff Shifts/Organizations.

2. Click Add Shift.
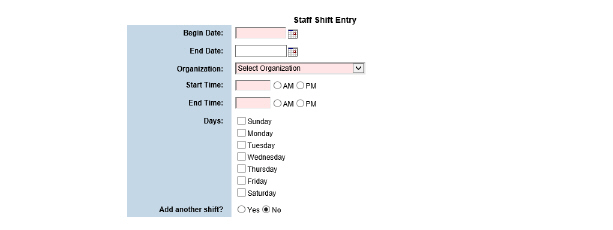
3. Fill out the needed information and click Submit. The staff member’s schedule is saved and listed on the Staff Shifts/Organizations page.
Overrides can be added to an existing staff schedule based on date, time and organization to accommodate days that the organization does not function under the normal schedule. (Snow days, training, etc...)
1. Navigate to Employee > Search for the employee and click Submit > Press the Select button for the correct employee > Show Menu > Staff Shifts/Organizations.

2. Click View Overrides.

3. Click Add Override.

4. Fill out the needed information and click Submit. The override is saved on the Staff Profile - Organization Override page.
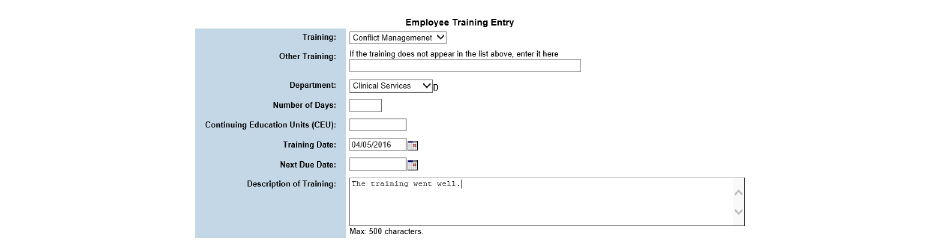
The Training module is used to set up a record for each training session in which the employee enrolls.
1. Navigate to Employee > Search for the employee and click Submit > Press the Select button for the correct employee > Show Menu > Training.

This page is used to perform the following tasks:
This task is used to track training programs that an employee completes. For each training record, the training type, date, number of days, and a description of the training can be tracked.
1. Navigate to Employee > Search for the employee and click Submit > Press the Select button for the correct employee > Show Menu > Training.

2. Click the Add Training button.
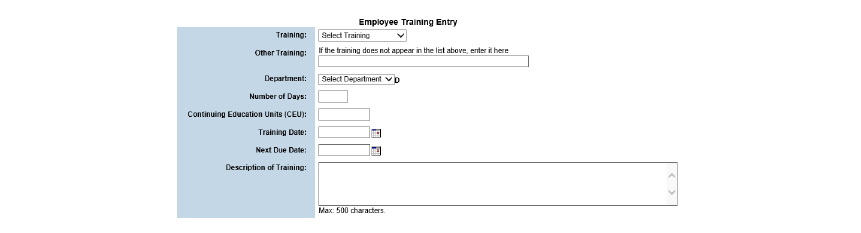
3. Fill out the needed information and click Submit. The training record is recorded on the Employee Training page.
1. Navigate to Employee > Search for the employee and click Submit > Press the Select button for the correct employee > Show Menu > Training.

2. Click the Select button for the training record needing edits.
3. Make the desired changes and click Submit. The changes are saved on the Employee Training page.
1. Navigate to Employee > Search for the employee and click Submit > Press the Select button for the correct employee > Show Menu > Training.

2. Click the Delete button for the training record needing deletion.

3. Select Yes to confirm and click Submit in the status bar. The selected training record is deleted from the system.
Maintaining Performance Reviews
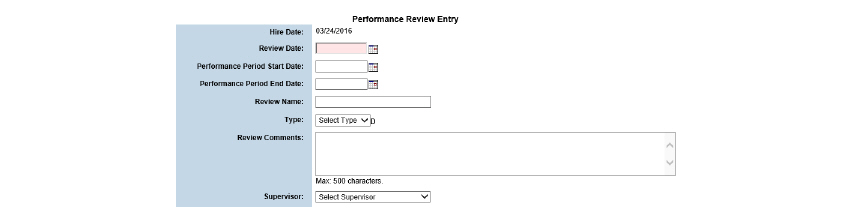
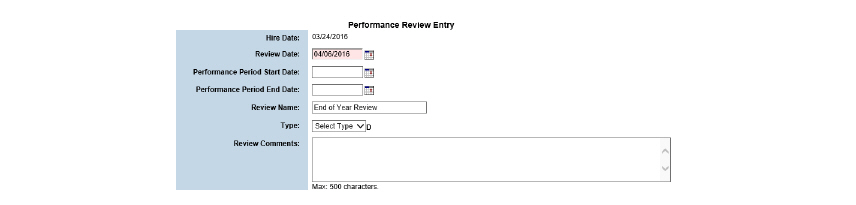
The Performance Review module is used to track employee performance reviews. It can track the review date, type of review, review comments, and date of next scheduled review.
1. Navigate to Employee > Search for the employee and click Submit > Press the Select button for the correct employee > Show Menu > Performance Reviews.

This page is used to perform the following tasks:
• Deleting Performance Reviews
1. Navigate to Employee > Search for the employee and click Submit > Press the Select button for the correct employee > Show Menu > Performance Reviews.

2. Click the Add New Performance Review button.
3. Fill out the needed information and click Submit. The performance review record is saved and listed on the Performance Reviews page.
1. Navigate to Employee > Search for the employee and click Submit > Press the Select button for the correct employee > Show Menu > Performance Reviews.

2. Click the performance review record needing edits.
3. Fill out the needed information and click Submit in the status bar. The updated performance review record is saved and listed on the Performance Reviews page.
1. Navigate to Employee > Search for the employee and click Submit > Press the Select button for the correct employee > Show Menu > Performance Reviews.

2. Click the Delete button for the performance review record needing deletion. Click OK on the deletion confirmation window that pops up. The performance review record is deleted.
The Documentation Review module allows users to set up rules that require a second signature on specific service documents or service document groups. This is usually done so that management can provide oversight on documentation. Documentation reviews can be set globally by individual, by business rule, and by document. Review periods can vary for each review type to satisfy business needs.
Once a documentation review business rule has been created (see Add Employee Document Rules in the System Administrator Guide), it can be applied to individuals or groups. When a rule is applied, each service document in the rule will be listed individually in the staff’s Service Document Review List. Adjustments can be made to individual service documents as needed. When applying a documentation review business rule to a group or individual, exceptions are made by selecting a longer time period and/or individual document types.
Set a Documentation Review Period by Group
Only one review period can be applied per document type. If applying a rule, no service documents in the rule can have an existing review period, even if it is in the past.
1. Navigate to Employee > Show Menu > Service Document Entry for Multiple Staff Members.
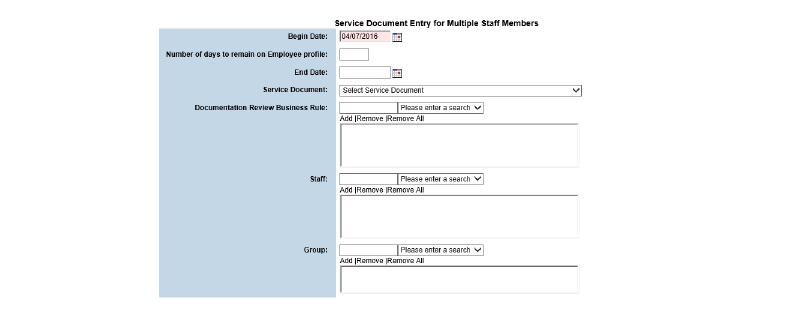
2. Fill out the needed information and click Submit.
Set a Documentation Review Period by Individual
Only one review period can be applied per document type. If applying a rule, no service documents in the rule can have an existing review period, even if it is in the past.
1. Navigate to Employee > Search for the employee and click Submit > Press the Select button for the correct employee > Show Menu > Documentation Review.

2. Click Add Documents.

3. Fill out the needed information and click Submit.
Edit a Documentation Review Period
A review period can be edited to change begin and end dates, number of days it remains on the employee’s profile, and the service document selected. This allows adjustments to match progress.
1. Navigate to Employee > Search for the employee and click Submit > Press the Select button for the correct employee > Show Menu > Documentation Review.

2. Select the service document to edit.

3. Fill out the needed information and click Submit.
End a Documentation Review Period
Ending a review period will allow staff to sign service documents without a supervisor’s signature.
1. Navigate to Employee > Search for the employee and click Submit > Press the Select button for the correct employee > Show Menu > Documentation Review.

2. Select the service document to end date.

3. Enter an End Date and click Submit.
Delete a Documentation Review Period
Only one review period can be applied per individual. If applying a rule, service documents in the rule cannot have an existing review period, even if it is in the past. Deleting a service document’s review period will allow it to be set again.
1. Navigate to Employee > Search for the employee and click Submit > Press the Select button for the correct employee > Show Menu > Documentation Review.

2. Click Delete for the desired service document. A delete confirmation popup appears, click OK. The review period is removed from the system.
Setting Up Performance Targets
The Performance Targets module is used to set up a target amount of hours worked for staff members.
1. Navigate to Employee > Search for the employee and click Submit > Press the Select button for the correct employee > Show Menu > Performance Targets.

2. Click Add Target Entry.
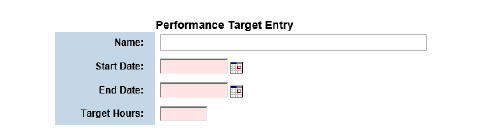
3. Fill out the needed information and click Submit. The Performance Target Entry page is expanded to allow for more customization of the staff member’s performance target.
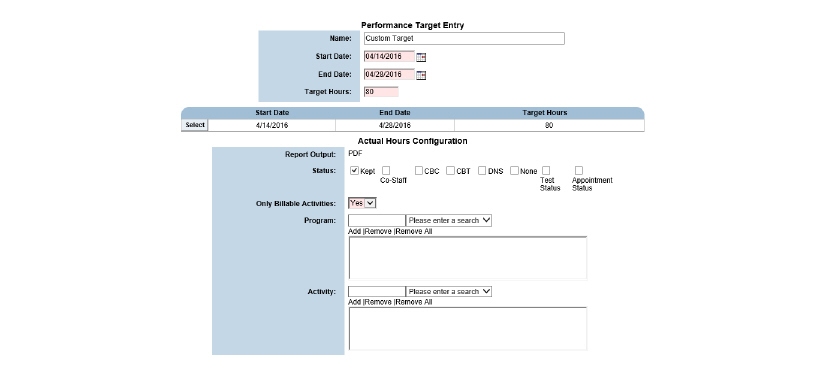
4. Use the extra fields to limit the type of hours that the system will look for and click Submit in the status bar.
Maintaining Employee Driver Information
The Driver Information module is used to maintain a record of the selected employees driving status.
1. Navigate to Employee > Search for the employee and click Submit > Press the Select button for the correct employee > Show Menu > Driver Information

2. Fill out the needed information and click Submit in the status bar. The driver information record is saved.
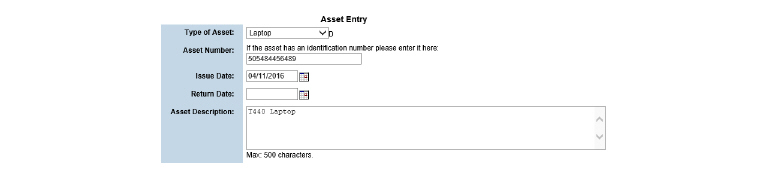
The Assets module is used to track and maintain a record of the resources an organization has assigned to its employees like cell phones or laptop computers.
1. Navigate to Employee > Search for the employee and click Submit > Press the Select button for the correct employee > Show Menu > Staff Assets.

This page is used to perform the following tasks:
1. Navigate to Employee > Search for the employee and click Submit > Press the Select button for the correct employee > Show Menu > Staff Assets.

2. Click the Add Assets button.
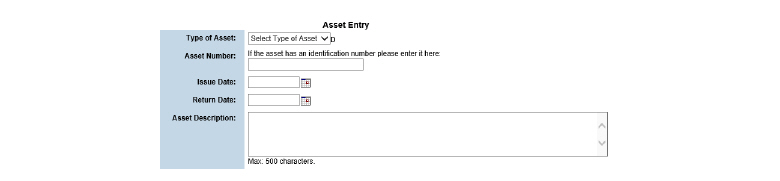
3. Fill out the needed information and click Submit. The asset record is saved and listed on the Staff Assets page.
1. Navigate to Employee > Search for the employee and click Submit > Press the Select button for the correct employee > Show Menu > Staff Assets.

2. Click the Select button for asset record needing edits.
3. Make any edits needed then click Submit. The updated asset record is saved and listed on the Staff Assets page.
1. Navigate to Employee > Search for the employee and click Submit > Press the Select button for the correct employee > Show Menu > Staff Assets.

2. Click the Delete button for the asset record needing deletion.

3. Select Yes to confirm deletion and click Submit. The selected asset record is deleted from the system.
The Staff Termination module records the termination date, the date the employee’s benefits expire, the termination type, and whether the employee is eligible for rehire.
|
Termination records in CareLogic do not affect employees’ benefits. Termination dates defined for insurance benefits are for tracking purposes only. |
|
Entering a termination record will generate alerts to all supervisors and supervisory groups. |
1. Navigate to Employee > Search for the employee and click Submit > Press the Select button for the correct employee > Show Menu > Staff Termination.

2. Click the Add Termination Record button.
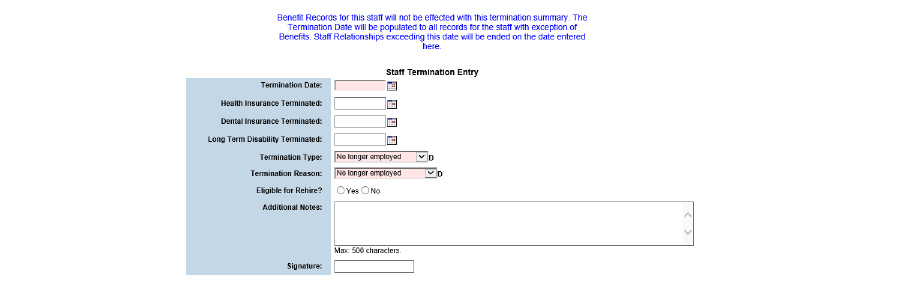
3. Fill out the needed information and click Submit in the status bar. The termination record is saved and listed on the Termination Entries page and will generate alerts to all supervisors and supervisory groups.
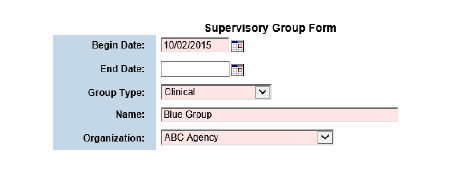
The Supervisory Group module is used to maintain supervisor groups for the selected staff member. This module provides a convenient way to maintain supervisor assignments through the Employee tab.
1. Navigate to Employee > Search for the employee and click Submit > Press the Select button for the correct employee > Show Menu > Supervisory Group Membership

This page is used to perform the following tasks:
• Adding a Staff Member to a New Supervisor Group
• Adding a Staff Member to an Existing Supervisor Group
• Removing a Staff Member from a Supervisor Group
Adding a Staff Member to a New Supervisor Group
1. Navigate to Employee > Search for the employee and click Submit > Press the Select button for the correct employee > Show Menu > Supervisory Group Membership.

2. Click Add to Supervisory Group Membership.

3. Click Add New Group.

4. Fill out the needed information and click Submit.
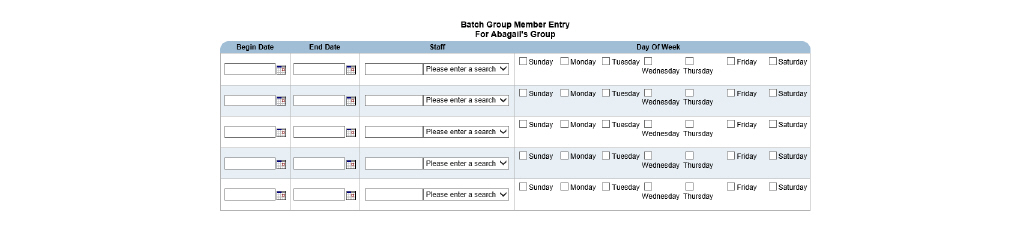
5. Fill out the staff members being added to the group and click Submit.

Adding a Staff Member to an Existing Supervisor Group
1. Navigate to Employee > Search for the employee and click Submit > Press the Select button for the correct employee > Show Menu > Supervisory Group Membership.

2. Click Add to Supervisory Group Membership.

3. Click Select for the desired group.
4. Click the Group Members button.

5. Click the Add Members button.

6. Add the desired employees to the group and click Submit.

Removing a Staff Member from a Supervisor Group
1. Navigate to Employee > Search for the employee and click Submit > Press the Select button for the correct employee > Show Menu > Supervisory Group Membership.

2. Click Add to Supervisory Group Membership.

3. Click Select for the desired group.

4. Click the Group Members button.

5. Click the Select button for the employee needing to be end dated from the Supervisory Group. Add the End Date.

6. Click Submit and the staff member is removed from the group on the date entered.
